Let’s learn how to Repair Reset Power Automate in Windows. Windows’ repair and reset option is the best feature for maintaining the smooth functioning of apps and devices. This feature allows you to check the working condition of the Power Automate Application.
Usually, many applications and programs cause some trouble during working time. Most of the time, users try to solve these problems by restarting or uninstalling the application. But these options did not work, and the running problem still exists.
The repair and rest options can solve running problems with applications. Running issues with different programs can also be resolved with these 2 options. You can maintain the smooth functioning of the Power Automate application.
This blog post discusses how to repair and reset Power Automate in Windows. You can solve all the problems of the Power Automate application with the repair and rest option. This post will help you to solve your problem immediately in Power Automate.
Power Automate is a Powerful application that allows you to manage manual, repetitive tasks. It is a part of Microsoft Power platforms. You will get complete guidance from the Power Automate Desktop application.
- Bing Chat Enterprise is Copilot Now | Data Protection for organizations
- How to Grant Read Write Permission Except Delete in Windows 11
What are the Advantages of Repair and Reset Option?
Repair and reset quickly resolve problems with different applications and programs. The repair and reset option has the following advantages.
1. It helps to resolve the problems of a program easily
2. It helps to resolve the running issue of an application quickly
3. Repair option allows to maintain the app data
How to Repair Reset Power Automate in Windows
Power Automate in Windows can be easily repaired and restored. This helps maintain the application’s smooth functioning. Repairing and resetting apps can be quickly done from the Settings.
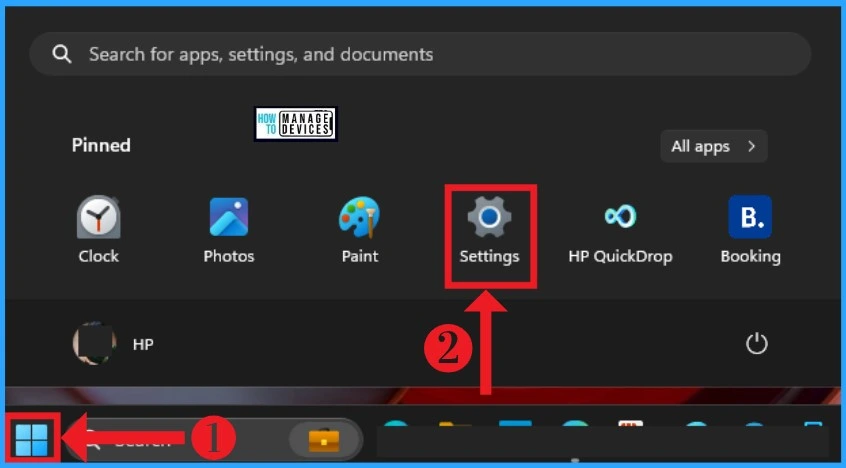
- Select Settings from the Start Menu
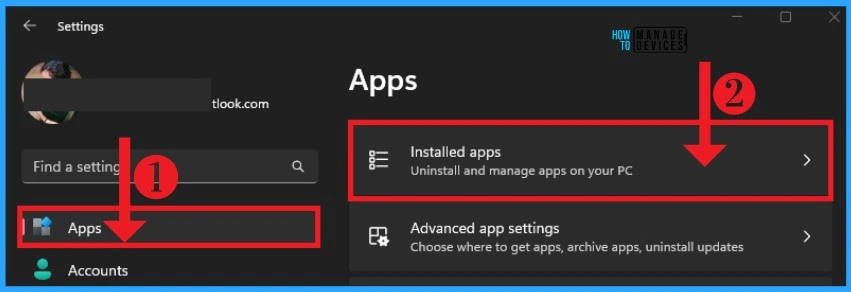
After that, click on the Apps section on the left side of Settings. Here, you can see the different App settings. Then click on the Installed Apps option in the Apps section.
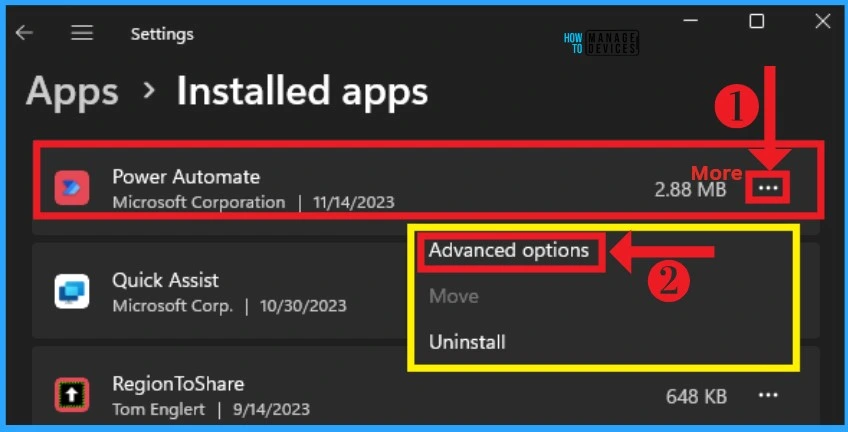
This Installed Apps section shows all the apps installed on your Windows PC. I selected the Power Automate application and clicked the 3 option. This window has several advanced options, including uninstalling the application.
- Click on the Advanced Options
After clicking on the Advanced option, you can see the reset section. Here, you can reset or repair the selected application, which allows you to improve its smooth running. The following table shows the difference between the repair and reset options.
| Repair and Reset | Difference |
|---|---|
| Repair | It helps to repair the application; it isn’t working right, and the app’s data won’t be affected |
| Reset | It helps reset the application; it isn’t working right, and the app’s data will be deleted. |
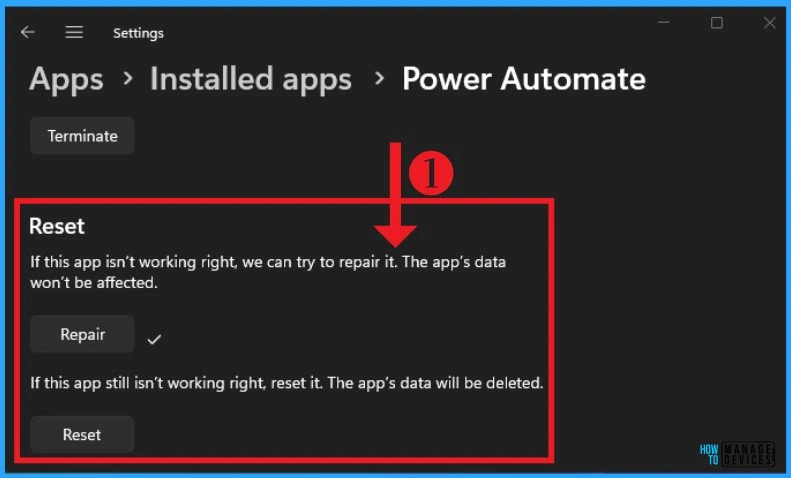
Repair Option
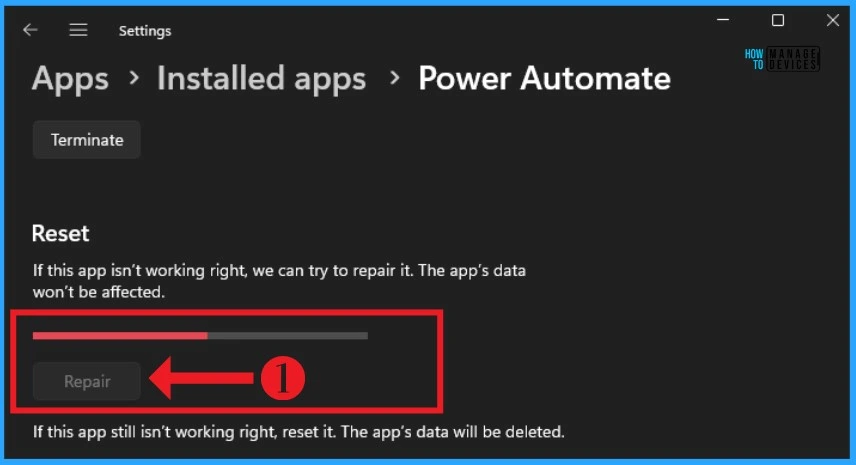
The Repair option is the best way to check and maintain the functioning of an installed application on a Windows PC. It allows you to repair an application quickly and easily and will keep your app up to date if you choose it.
- Click on the Repair option in the below window
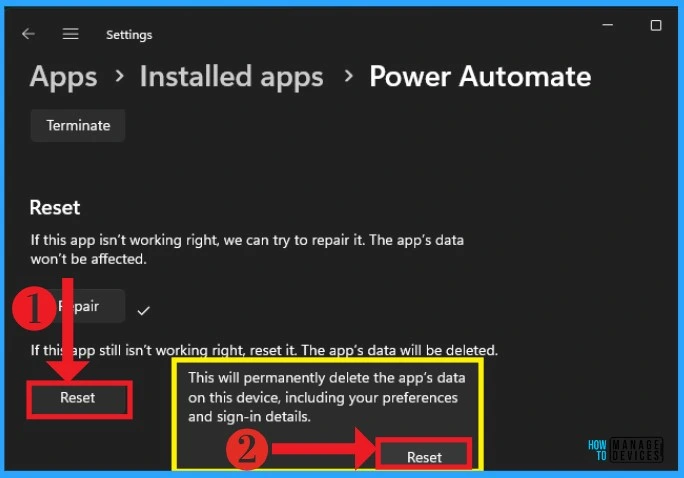
Reset Option
If the repair option doesn’t work, you can choose the Reset option to stop that problem. The Reset option permanently deletes the app’s data on your device, including your preferences and sign-in details. When you click on the Reset option, a pop-up window will appear. Click on the Reset option in the pop-up window.
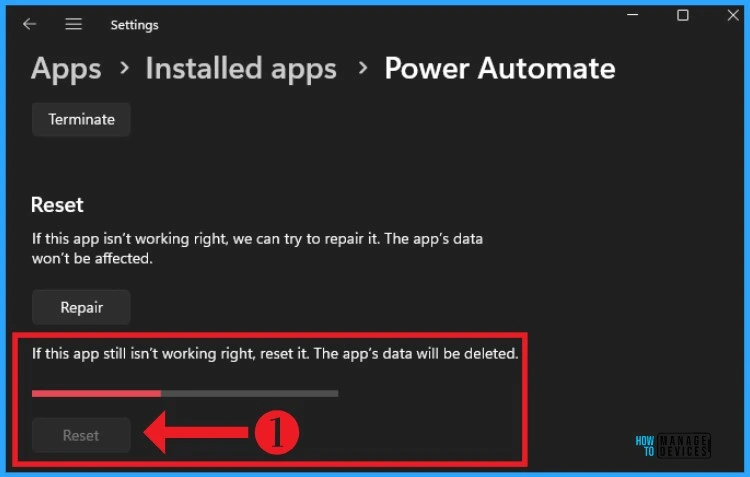
After that, Power Automate will start resetting and resolving all the problems. The Reset option will delete all your data on the Power Automate application.
We are on WhatsApp. To get the latest step-by-step guides and news updates, Join our Channel. Click here HTMD WhatsApp
Author
Gopika S Nair is a computer enthusiast. She loves writing on Windows 11 and related technologies. She is here to share quick tips and tricks with Windows 11 or Windows 10 users. She is Post Graduate Diploma Holder in Computer Science
