Let’s check Multiple Methods to Open Disk Management in Windows 11. Disk Management is a built-in tool that helps manage the disk spaces and their partitions. Users can efficiently perform advanced storage tasks like initializing a new drive and extending or shrinking volumes.
Did you know Disk Management is a critical operation in a Windows 11 PC? It organises the data stored on secondary devices, including hard disks and solid-state drives, and allows users to optimize the data.
With Disk Management, the data is ensured to be safe by implementing various risk management techniques. The primary purpose of disk management is to efficiently utilize the available storage space and ensure data integrity and security.
Disk management plays a vital role in improving the system’s performance. It is the best tool for determining the storage space of your Windows PC. This blog post will help you open Disk Management using different methods.
What are the Advantages of Disk Management in Windows 11?
Disk Management is one of the best tools on Windows 11 PCs. It is used to initialize hard drives, create, resize, or delete partitions, change drive letters, and more. The following are the Advantages of Disk Management in Windows 11.
1. It helps to Improve the organization and management of data
2. Efficient use of available storage space
3. Helps to improve data integrity and security
4. It helps to improve performance through techniques such as defragmentation
- How to Show or Hide Empty Drives in Windows 11
- Different Ways to Find CPU or Processor Specs in Windows 11
Multiple Methods to Open Disk Management in Windows 11
There are many methods available for opening Disk Management. Each technique is simple and easy to access. The table below helps you access Disk Management with different methods in Windows 11.
| Multiple Methods to Open Disk Management in Windows 11 |
|---|
| Search Disk Management in Start Menu |
| Open Disk Management using Computer Management Menu |
| Open Disk Management using Run Command |
| Use the Start Menu to Run Disk Management |
| Use Command Prompt or PowerShell to Launch Disk Management |
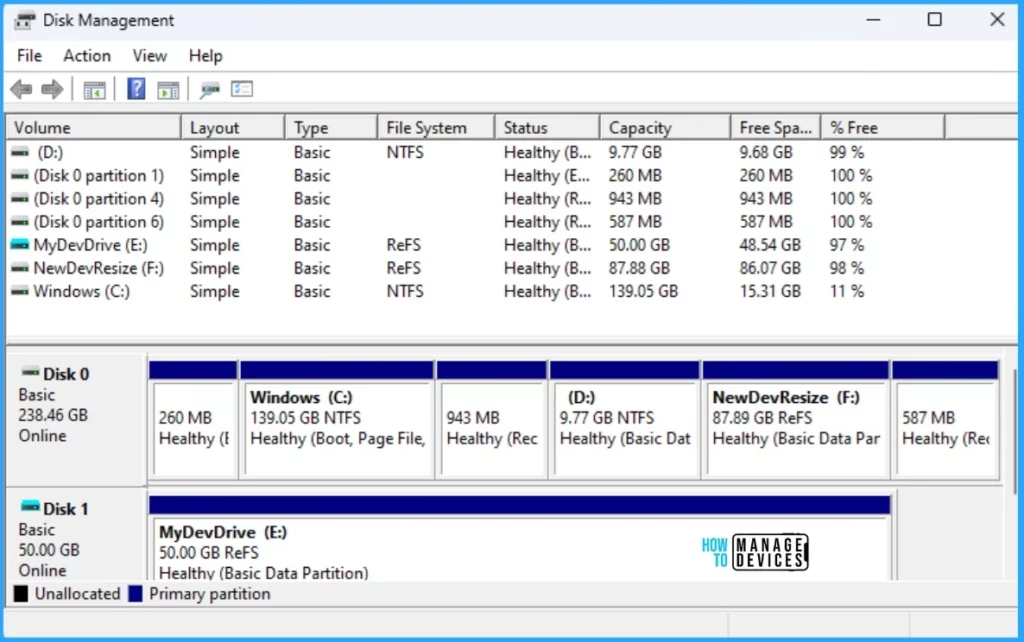
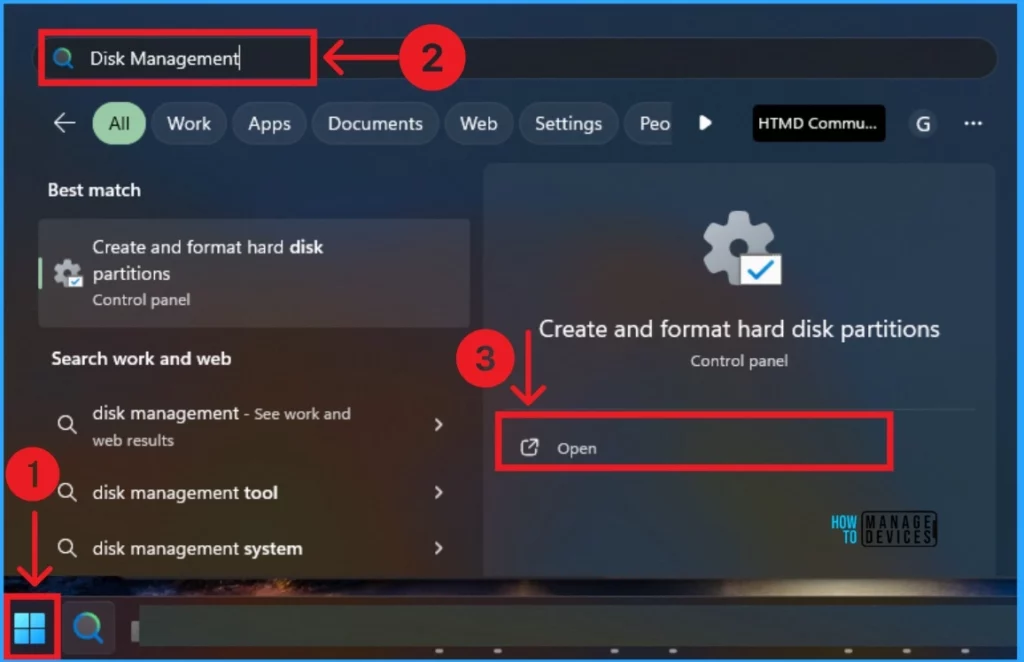
1. Search Disk Management in Start Menu
The first and easiest method to open disk management is to start the menu. To open Disk Management from the Start Menu, click on the Start Menu and search for Disk Management on the search bar. Then, you can see the Create and Format hard disk option. Click on the Open button.
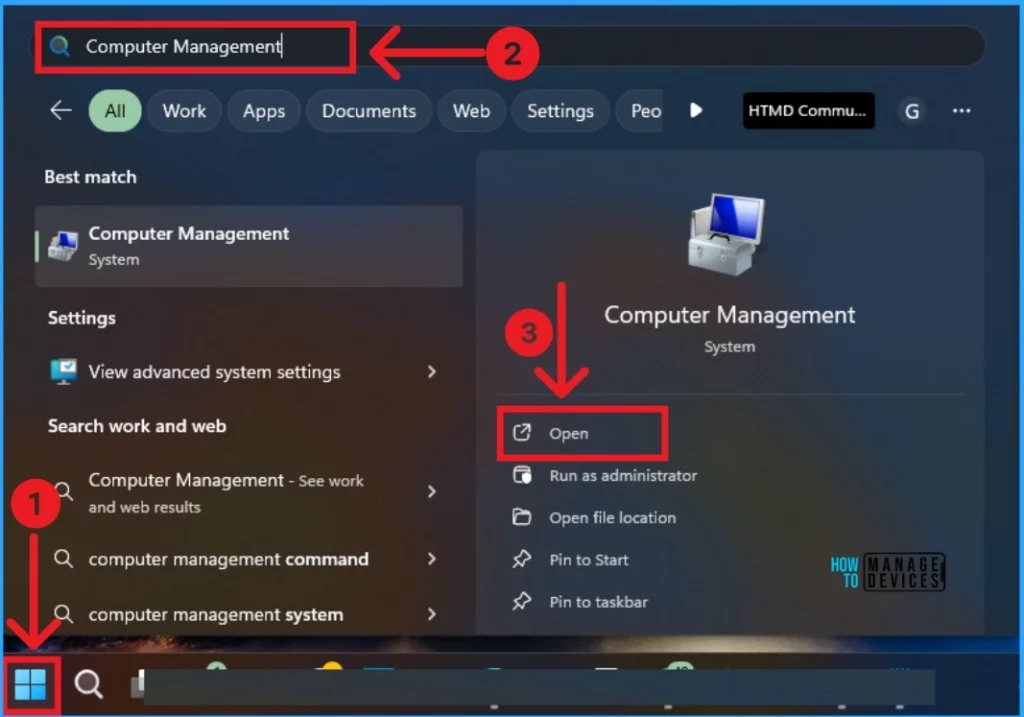
2. Open Disk Management using Computer Management Menu
You can easily open Disk Management via Computer Management. Computer Management is a set of tools that help users manage tasks and performance. To access Disk Management from Computer Management:
- Click on the Start Menu
- Search Computer Management on the Search bar.
- Click on the Open.
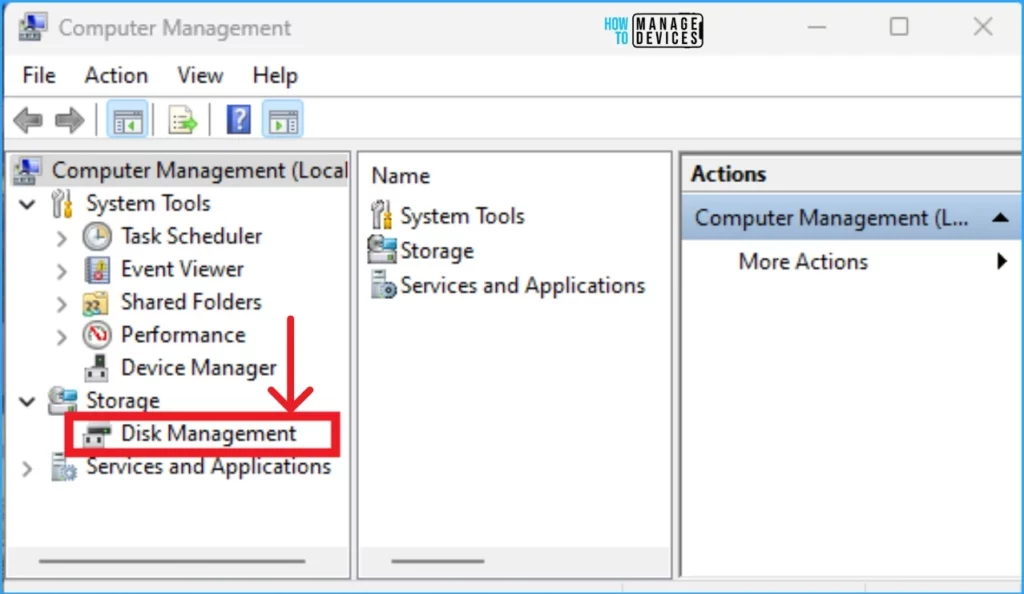
You can easily access Disk Management from Computer Management. In this window, you can see different options. Expand the Storage option to open the Disk Management.
- Easy Methods to Check Hardware Specifications on Windows 11
- How to Check Drive Encryption Support in Windows 11
3. Open Disk Management using Run Command
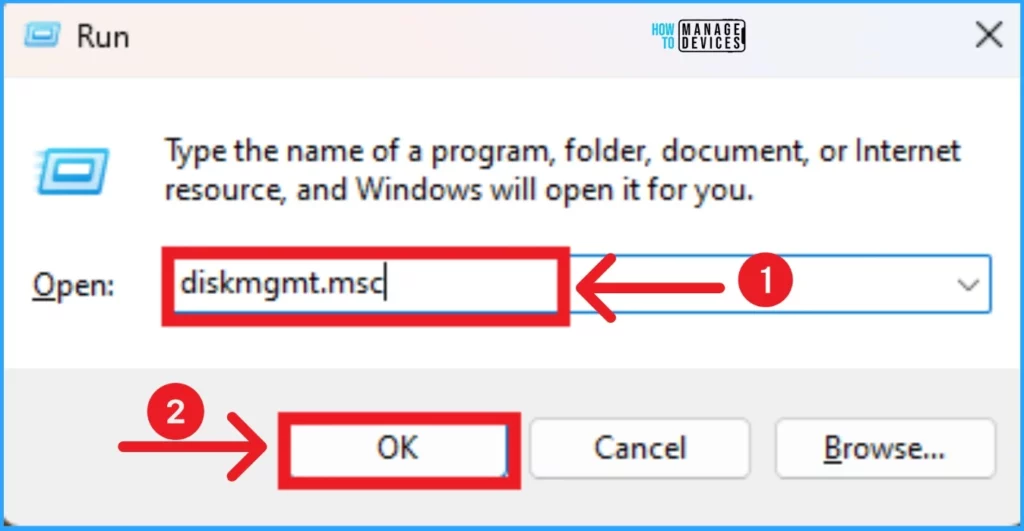
Using the Run command, you can easily open Disk Management on a Windows 11 PC. To do this, press Win+R to open Run command Window. In the Run Command, type diskmgmt.msc and Click on the OK button.
4. Use Start Menu to Run Disk Management
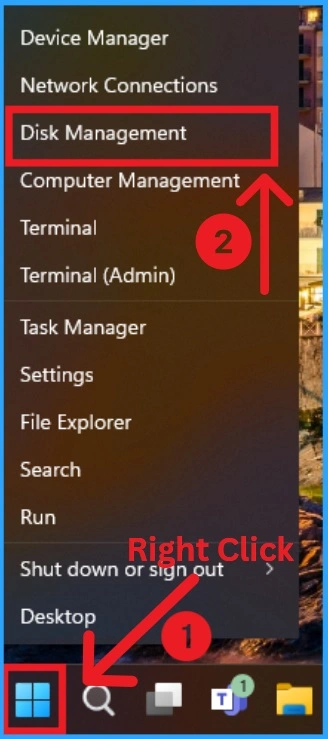
Using the Start Menu, you can easily Open Disk Management. It is also a simple method for users. To do this, Right-click on the Start Menu and click Disk Management.
5. Use Command Prompt or PowerShell to Launch Disk Management
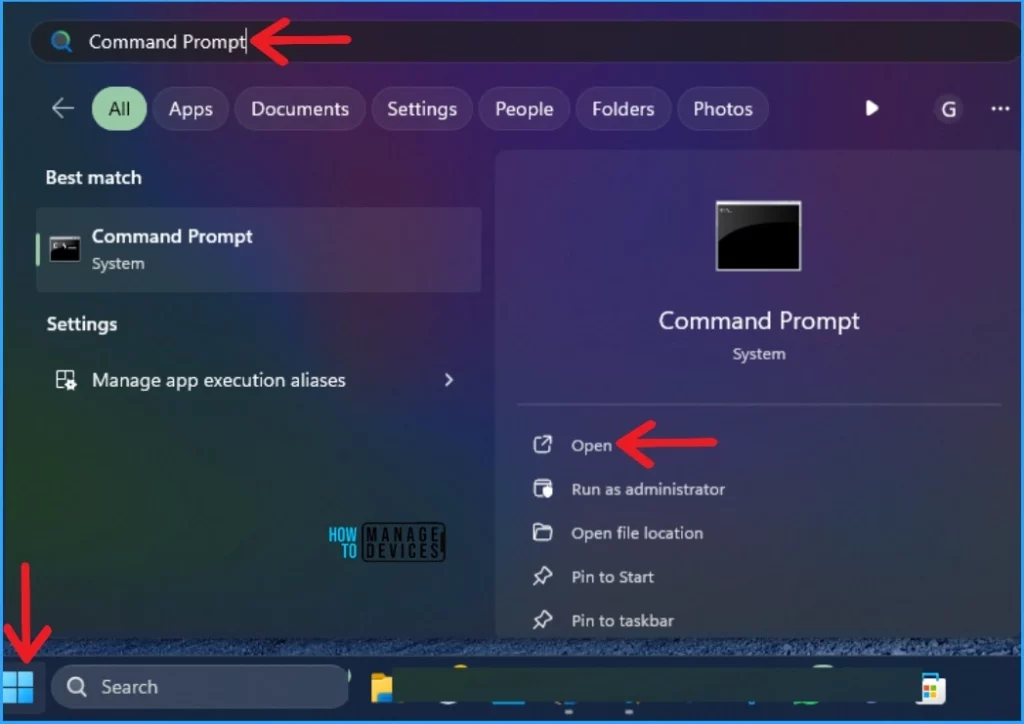
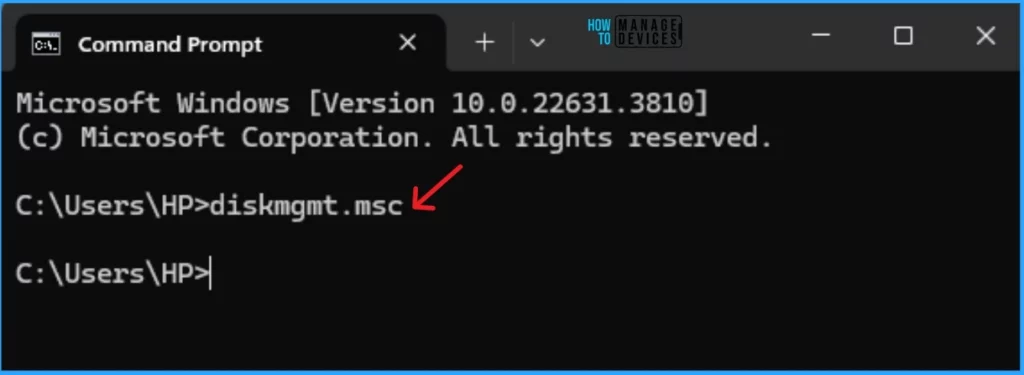
Command Prompt or Powershell also helps you to access Disk Management on your Windows 11 PC. To do this, Click on the Start Menu and Search Command Prompt on the Search bar. Then, Open it from the window below.
In the Command Prompt, type diskmgmt.msc and press the Enter key. Disk Management will open on your Windows 11 PC.
Note: You can also use diskmgmt.msc command on Windows PowerShell.
- How to Find Network Adapter Connection Speed in Windows 11
- 5 Methods for Finding Memory Size Speed and Type in Windows 11
We are on WhatsApp. To get the latest step-by-step guides and news updates, Join our Channel. Click here –HTMD WhatsApp.
Author
Anoop C Nair is Microsoft MVP! He is a Device Management Admin with more than 20 years of experience (calculation done in 2021) in IT. He is a Blogger, Speaker, and Local User Group HTMD Community leader. His main focus is on Device Management technologies like SCCM 2012, Current Branch, and Intune. He writes about ConfigMgr, Windows 11, Windows 10, Azure AD, Microsoft Intune, Windows 365, AVD, etc.
