This post will cover all the steps to deploy Windows 11 22H2 using SCCM (aka Configuration Manager). This guide includes downloading Windows 11 22H2 ISO, importing Windows 11 into SCCM, and deploying it using the task sequence.
The new Windows 11 Version 22H2 is now available for all users as a free update. This update introduces a new bunch of features to the user regarding security, visibility, and many more. Microsoft officially released the latest update on 20 September 2022.
Let’s check the steps to install the latest Windows version on a new computer (bare metal) using sccm. The bare metal scenario occurs when you have a blank machine you need to deploy or an existing device you want to wipe and redeploy without preserving any existing data.
This bare metal scenario helps us install a new Windows version on a new computer. It’s a fresh installation of the OS and doesn’t include any settings or user data migration. The deployment process for the new machine scenario is as follows:
- Start the setup from boot media (CD, USB, ISO, or PXE).
- Wipe the hard disk clean and create new volume.
- Install the operating system image.
- Apply device drivers by detecting device manufacturers.
- Install applications.
- Apply Customization, Additional settings if needed.
- After taking these steps, the computer is ready for use.
- Windows 11 22H2 Upgrade using SCCM Feature Update Option
- SCCM Servicing Plans for Windows 11 in-place Upgrade
Prerequisites – Windows 11 Deployment
Before you use to deploy Windows 11, You need to make sure of the following prerequisites.
Supported SCCM (ConfigMgr) Version
Ensure you are running with the latest version of Configuration Manager 2207. Here in the support matrix, you can see the supported version for Windows 11, 21H2. I’m expecting the version to remain the same for Windows 11, 22H2.

Windows 11 Hardware Requirements
The devices should meet the Windows 11 minimum requirements for Windows 11 upgrade. Using the PC Health Check app, you can check for compatibility to see if your current PC meets the minimum system requirements to run Windows 11. You have to download the Windows 11 PC Health Check App from the Microsoft site.
- Make sure that you’re running a supported version of the Windows ADK. The ADK for Windows 10, version 2004, and Windows 11 will work with Windows 11.
- Add the required Network and Storage drivers to the boot image.
- Configured the boot image to deploy from a PXE-enabled distribution point.
- Latest Features of Windows 11 22H2 and Advanced Features
- Top 20 Methods to Increase Windows 11 Performance Optimization
Download Windows 11 22H2 ISO
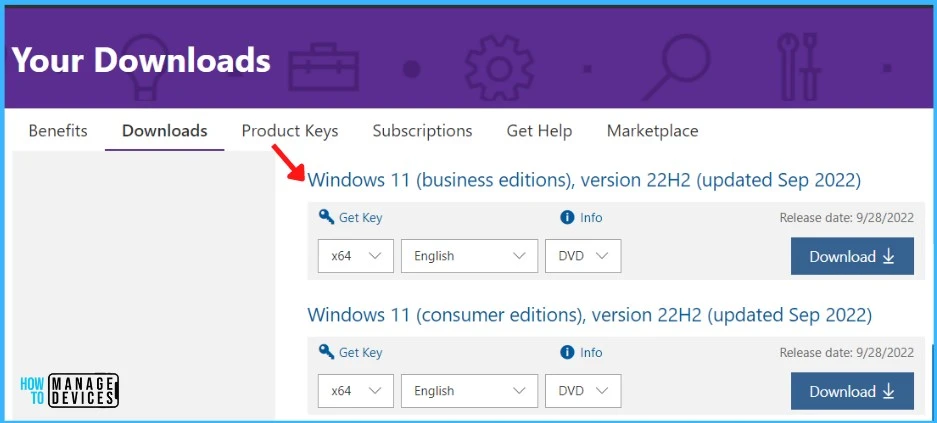
You can download Windows 11 22H2 ISO from MSDN or VLSC (Volume Licensing Service Center). Find Windows 11 (business editions) version 22H2. Select the architecture and language. Click on Download.
- Improve Windows 11 Performance using Debloat Tool
- Windows 11 22H2 Group Policy Settings list Download
Mount and Extract Windows 11 22H2 ISO
Before importing the Windows 11 22H2 Operating System into SCCM, mount and extract or copy Windows 11 ISO contents to a folder. Create a shared folder, and Mount the ISO using File Explorer or any other available options.
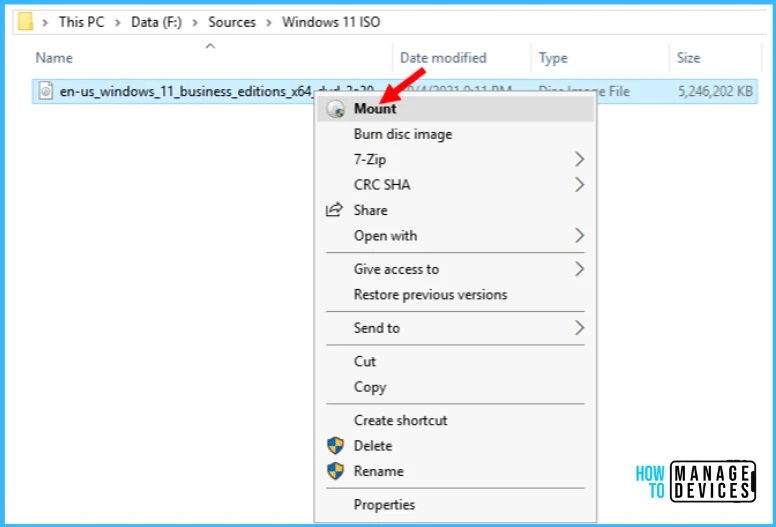
Copy the downloaded ISO to the SCCM site server, Double-click an ISO file to mount it, or Right-click an ISO file in file explorer. Select the Mount option.
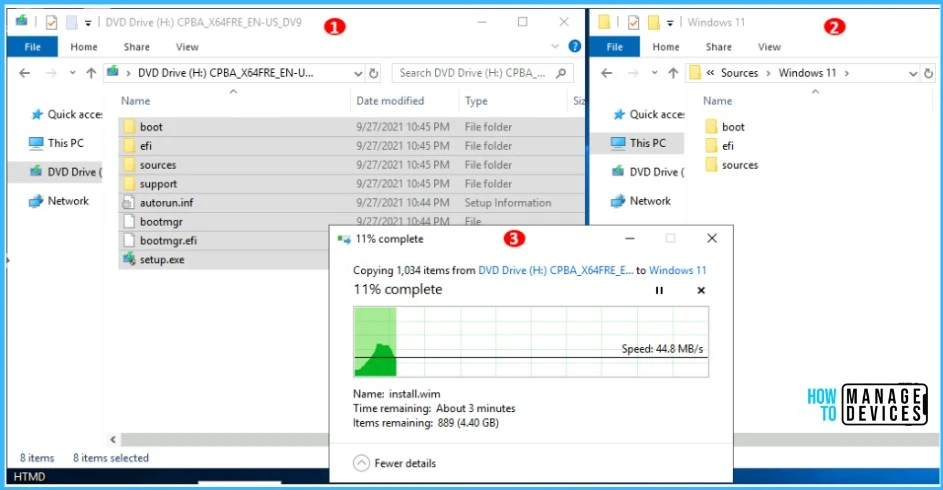
You will notice that Windows 11 ISO will create a disc drive that you can use to access content. Select all contents and copy them to a shared source folder in SCCM Server. The content-copying process might take some time. Wait to complete the process.
Note – You can locate the default OS image in the Windows source folder \Sources\install.wim. Grab a file off of this ISO and Copy it to the shared directory to make use of it.
Import Windows 11 22H2 Operating System Image
The operating system image contains the files necessary to install the operating system on the destination computer. Use the following to prepare the operating system image –
- In Configuration Manager Console, Go to Software Library > Operating Systems > Operating System Images.
- Right click on Operating Systems Images and click on Add Operating System Image.
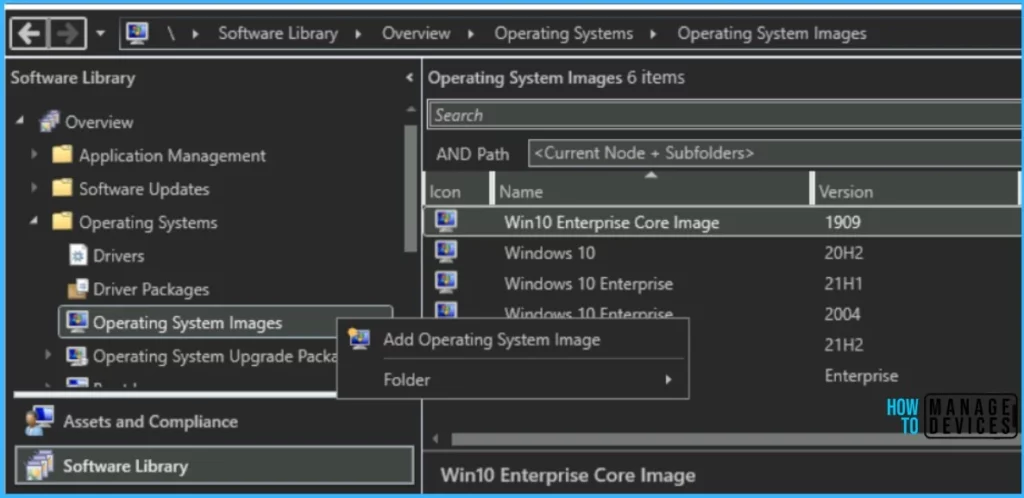
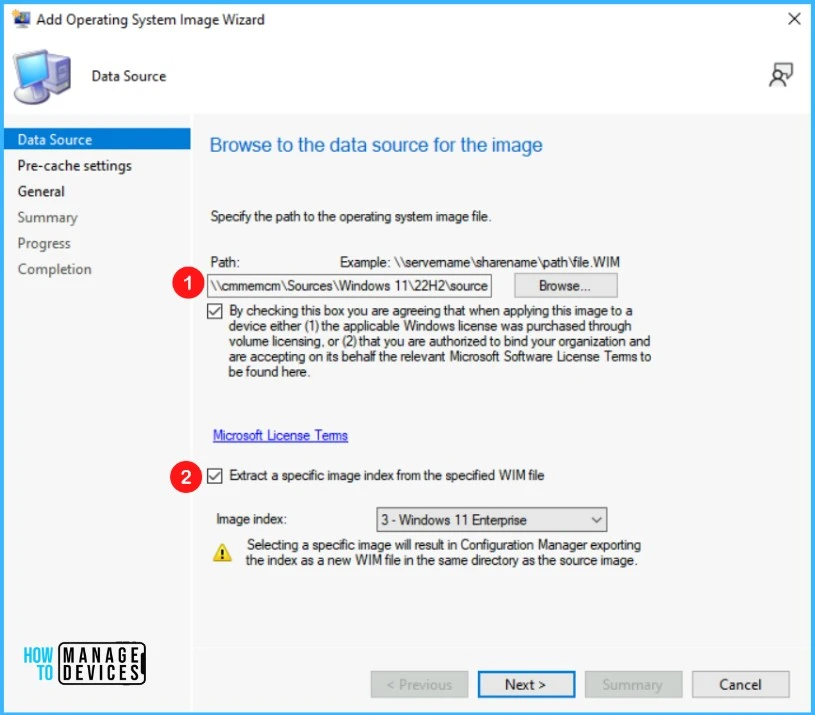
In Data Source, click Browse and specify the network shared path to the install.wim from the Windows 11 Source directory where you extracted the source of an ISO file.
Note! Extract a specific image index from the specified WIM file – You can now automatically import a single Image index rather than all image indexes in the file. Using this option results in a smaller image file.
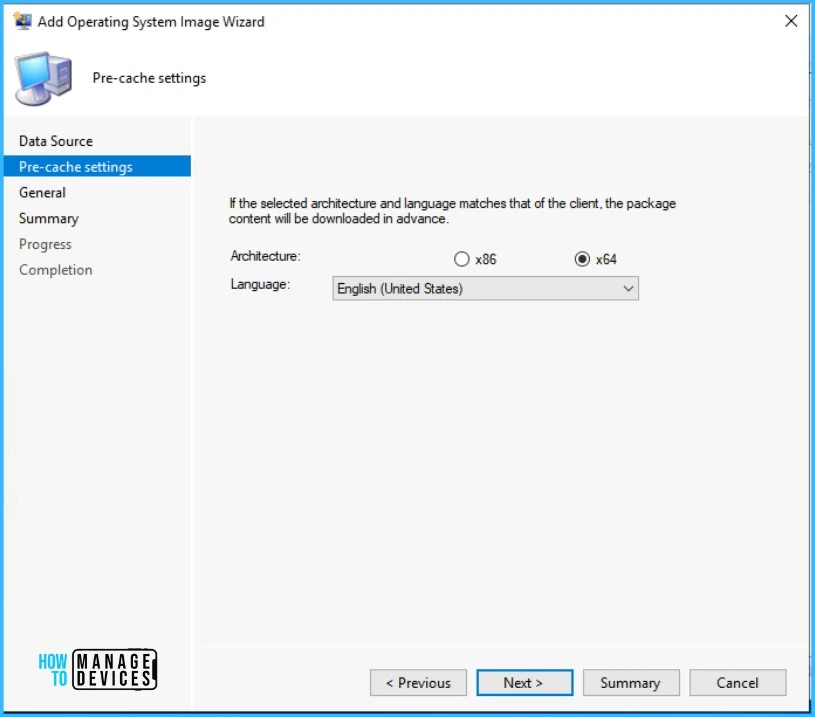
On the Pre-cache settings page, select Architecture as x64 and Language English (United States), and click Next. You can leave this option as default.
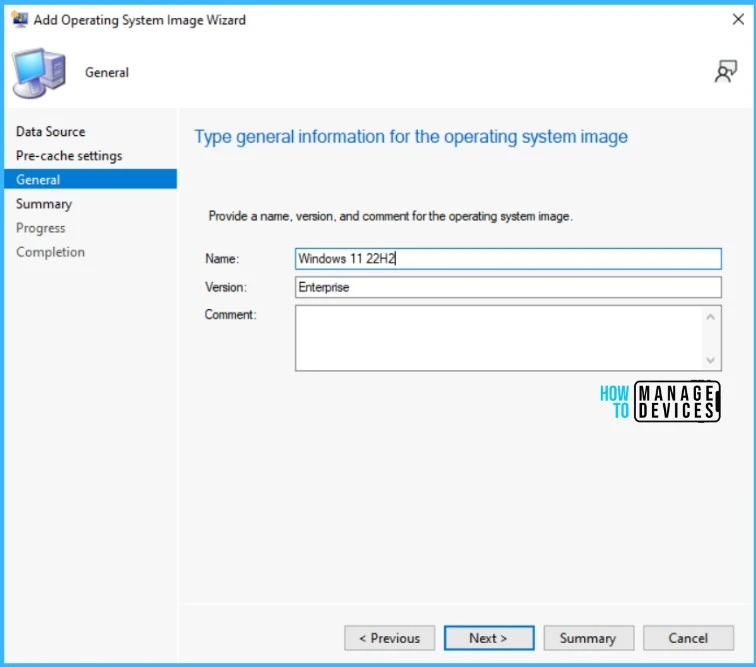
It is best to provide all the information for OS Image. On the General page, Enter the Name, Version, and Comment for the Task Sequence. Click Next.
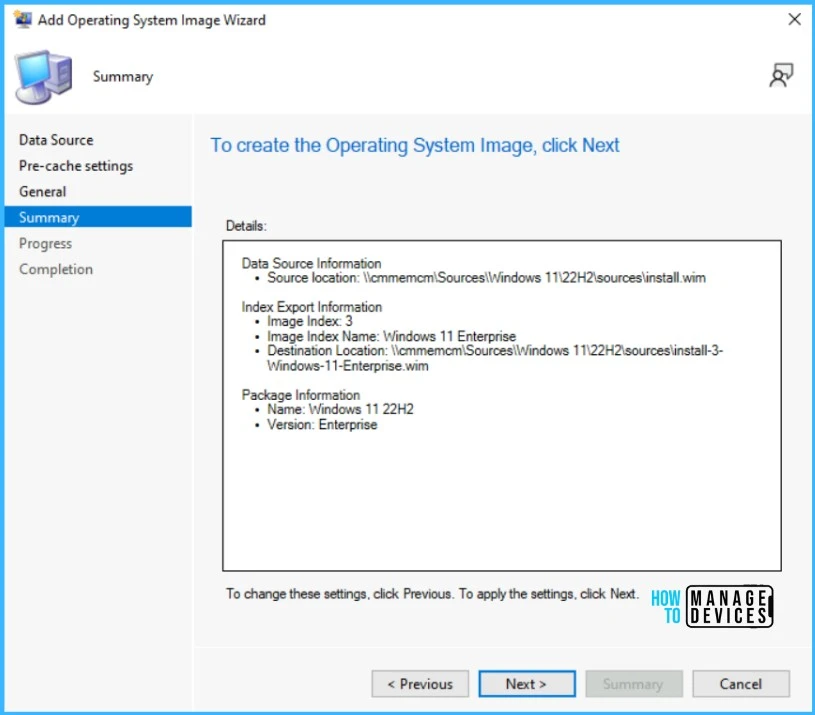
Once you have done, Review the provided information, and click Next to complete the wizard.
Wait for a moment while exporting is in progress. After successful completion, click Close to exit the wizard.
The Windows 11 22H2 Operating System Image now appears in the Operating System Images node of the Configuration Manager console.

Distribute Windows 11 22H2 Operating System Image
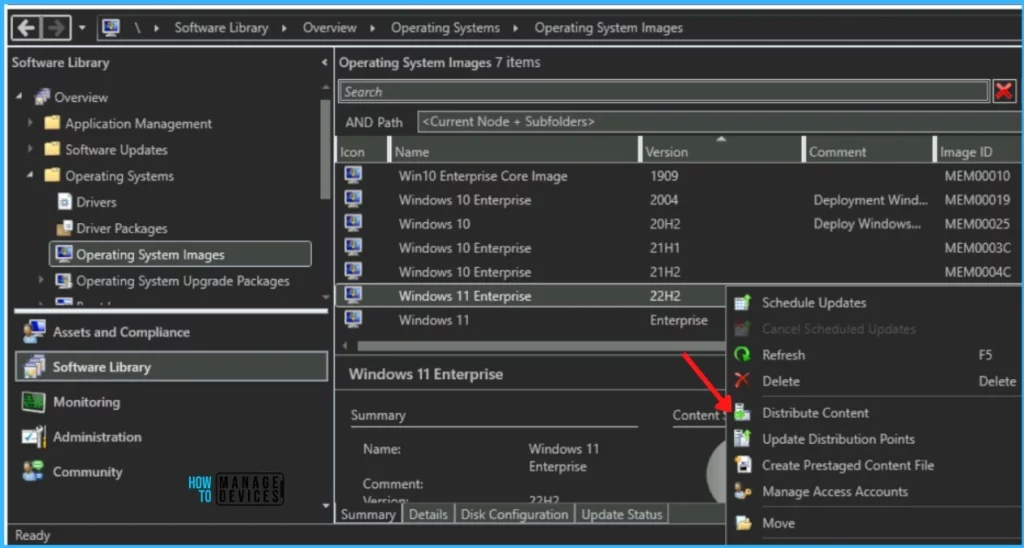
After the creation of the OS Image Package, it will appear in the Operating System Images Node. To begin with, the distribution right-click on the Windows 11 Image and click on Distribute Content.
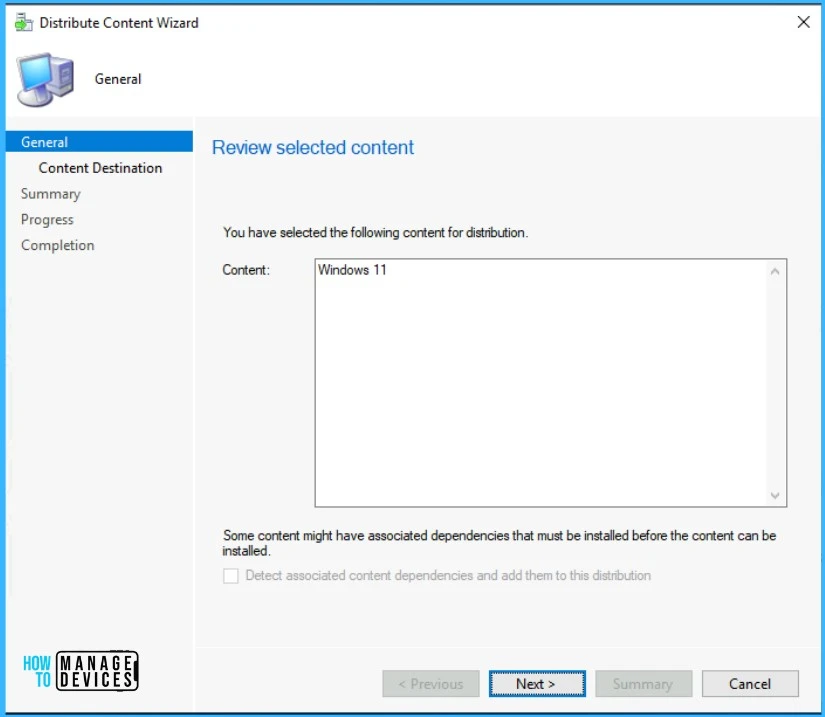
Here you have selected Windows 11 Image for distribution, Review the selected content for distribution. Click Next.
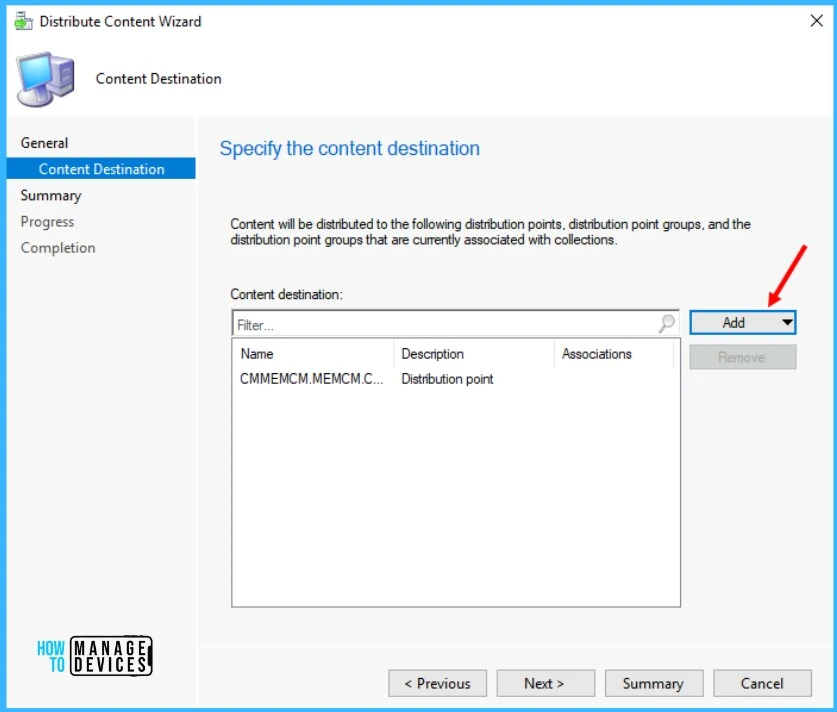
Add the Distribution Point to distribute the content, Review the selected distribution points, groups. Click Next.
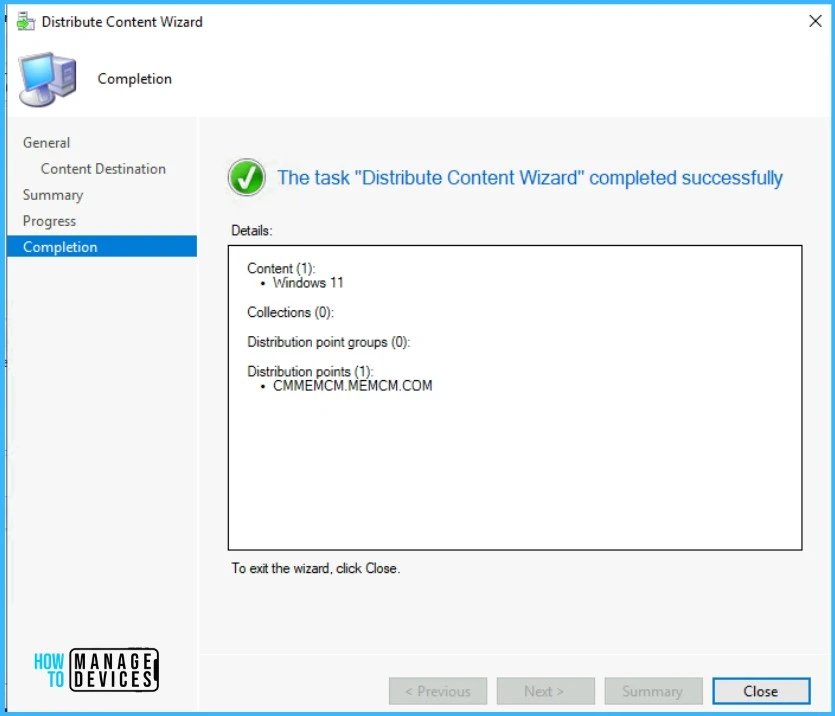
On the Summary page, review the settings. Click Next. Click Close to complete the Distribute Content wizard.
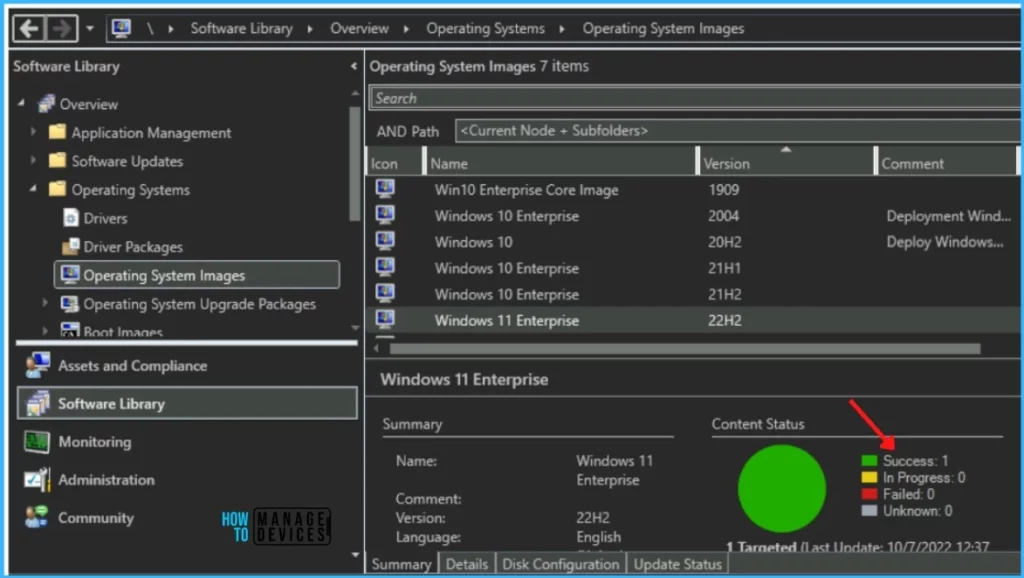
You can monitor the content status. If it’s showing a yellow color, that means distribution is in progress. If the content distribution were successful, it would appear with Green color as shown.
- SCCM Collection for Windows 11 22H2 Devices | CMPivot | SQL Queries
- SCCM Collection Best Practices while Creating a Dynamic Collection
Create Task Sequence to Deploy Windows 11 22H2
In the Configuration Manager console, Go to the Software Library workspace, expand Operating Systems, right-click Task Sequences, and select Create Task Sequence.
Select Install an existing image package. This option creates a task sequence that installs the OS, migrates user settings, applies software updates, installs applications, and then selects Next.
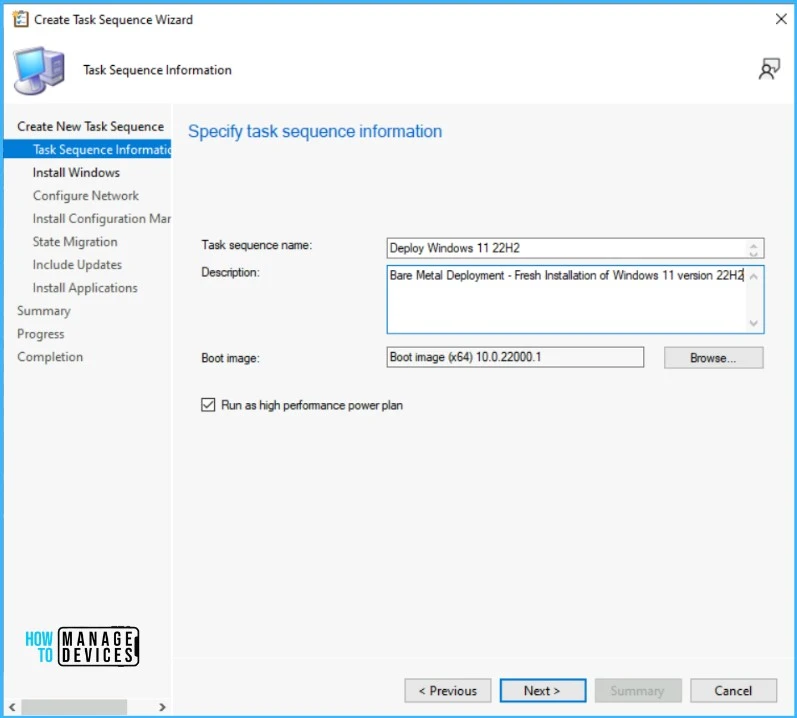
On the Task Sequence Information page, specify the following settings and click Next.
- Task sequence name: Specify a name that identifies the task sequence.
- Description: Optionally specify a description
- On the Boot Image, Click Browse and select the available boot image package. Select Run as high performance power plan check box.
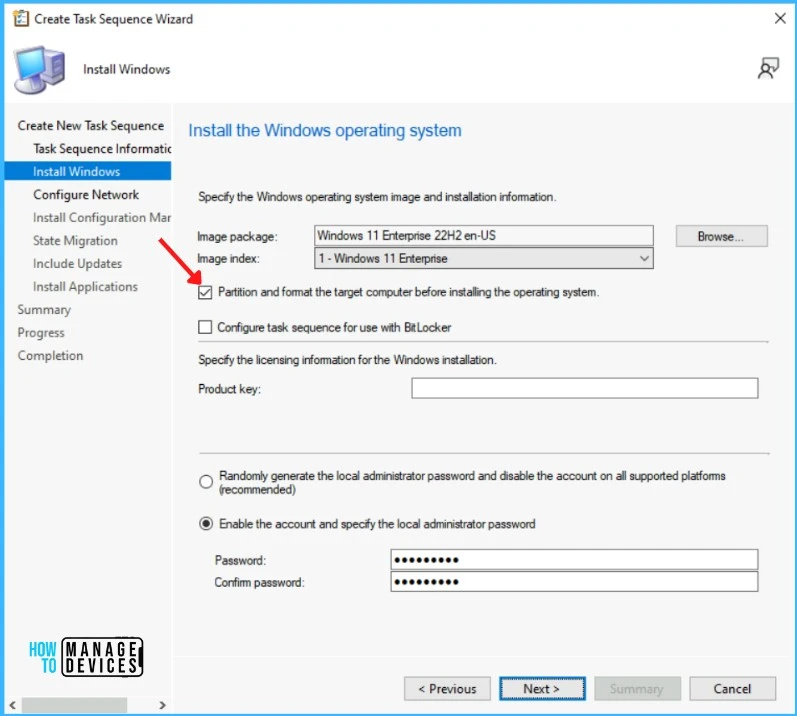
On the Install Windows page, specify the following settings and click Next.
Image package: Click on Browse to select the image. Select Partition and format the target computer installing the operating system.
- Unchecked Configure task sequence for use with BitLocker – Since we don’t want to add the Bitlocker step to the task sequence,
- Product key: you can specify the Windows product key for the OS to install.
Specify how to handle the administrator account for the new OS. Enable the account and specify the local administrator password – Windows uses the same password for the local administrator account on all computers where the task sequence deploys the OS image.
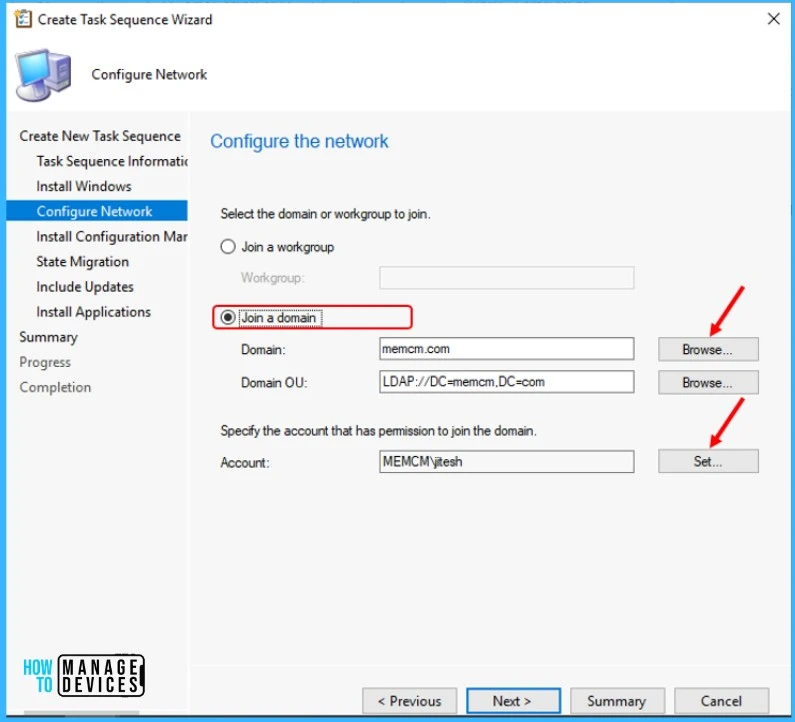
On the Configure Network page, specify the following settings. Click Next.
Join a workgroup: Add the destination computer to a workgroup.
Join a domain: Add the destination computer to a domain. In Domain, click Browse to specify the name of the domain. You can also specify an organizational unit (OU) in the Domain OU field. This setting is optional—Account: The user name and password for the account have permissions to join the specified domain.
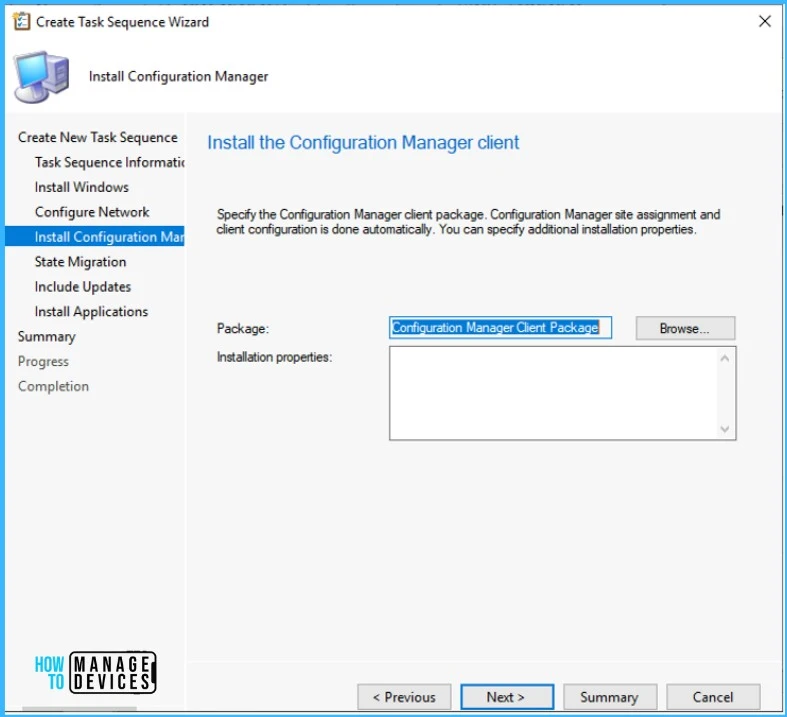
On the Install Configuration Manager page, specify the Configuration Manager client package is selected automatically. If required, you can specify additional SCCM client installation properties. Click Next.
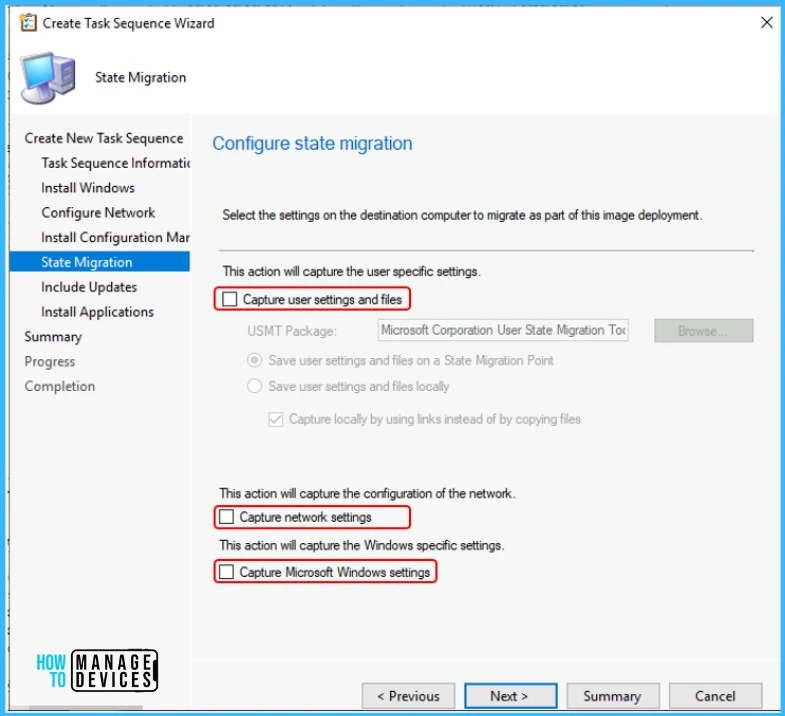
On the State Migration page, you can leave it to default or Uncheck all the options if you do not want to capture settings.
These steps are condition-based in a task sequence that is not going to run automatically. Click Next.
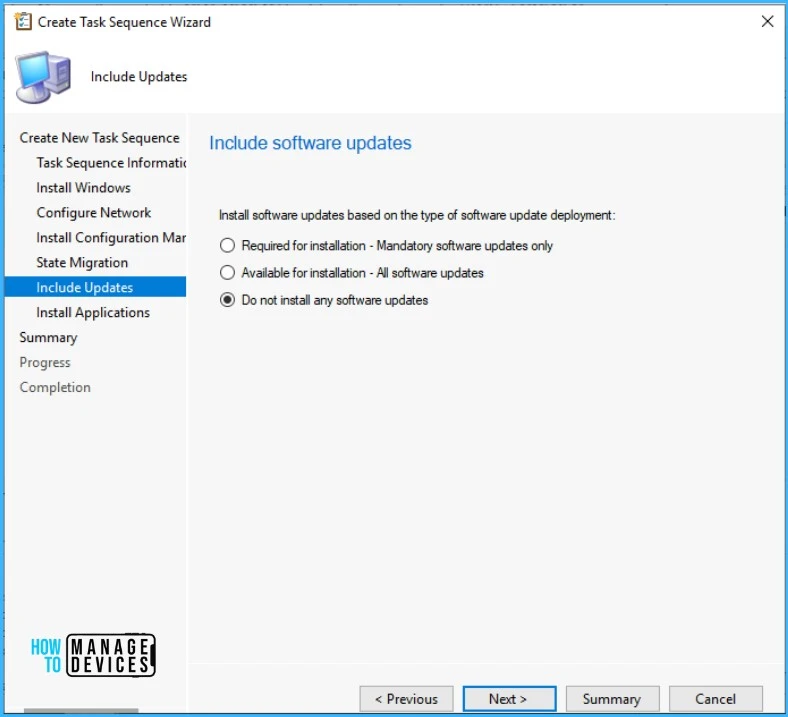
On the Include Updates page, you can specify whether to install the required software updates or all software updates. Here I’m not installing any software updates, leaving the option default and Clicking Next.
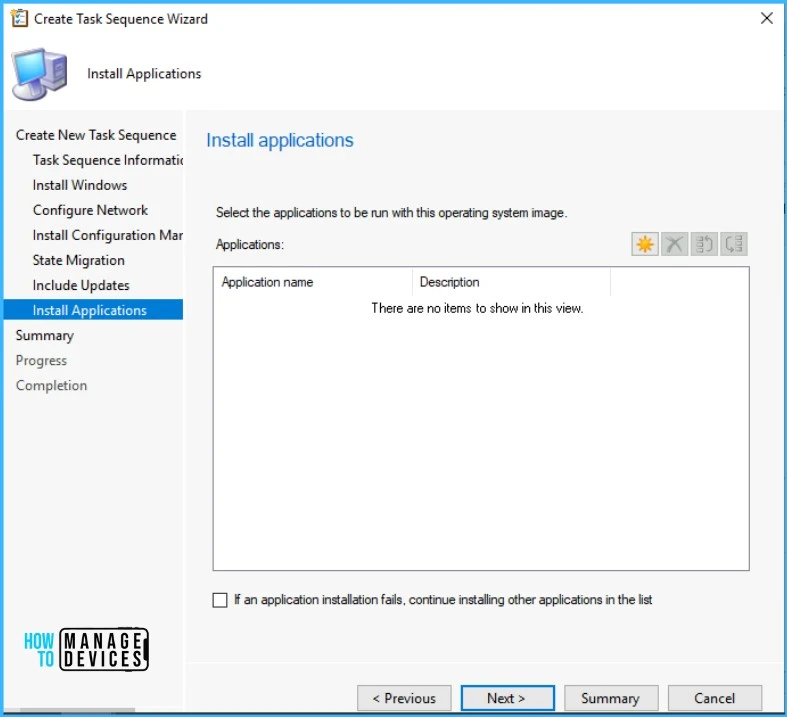
On the Install Applications page, specify the applications to install, or later you can add in task sequence steps. Click Next.
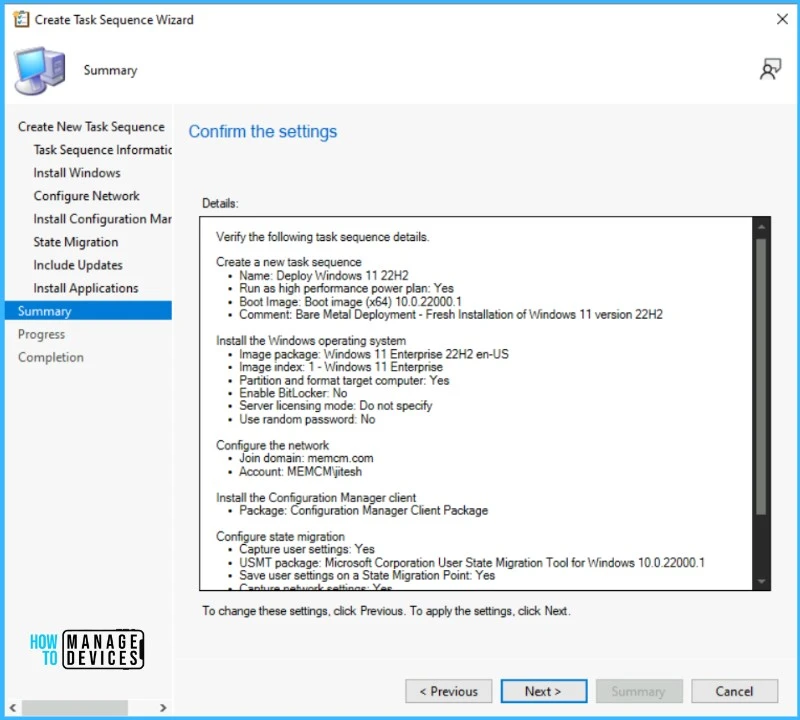
Review the task sequence details, Click Next.
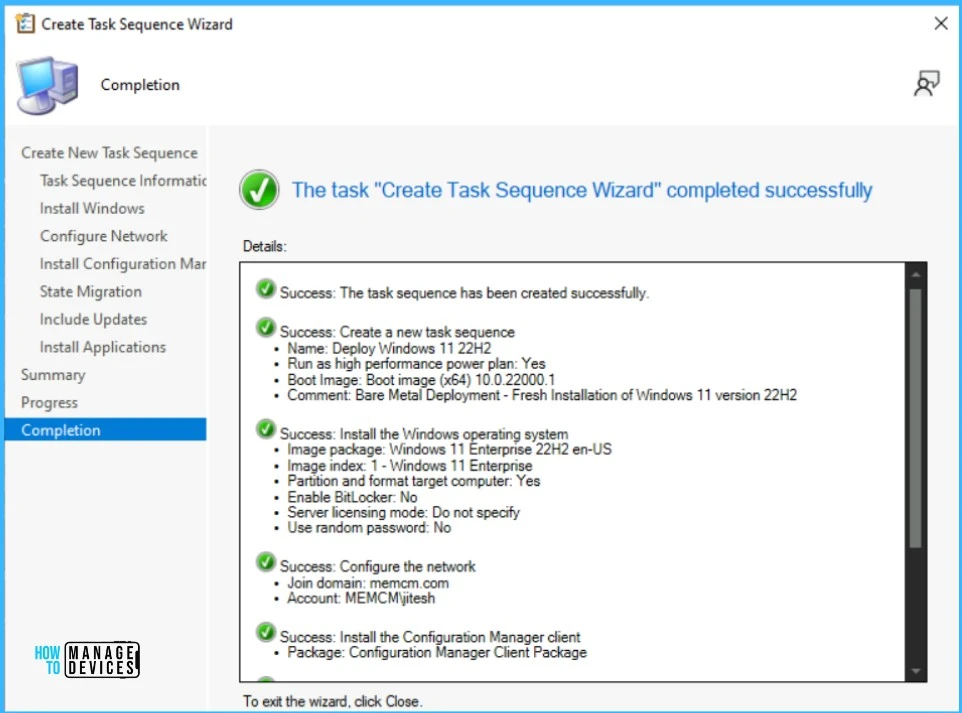
Click Close to complete the wizard.
Edit Windows 11 22H2 Task Sequence
Let’s follow the steps to modify an existing task sequence in the Configuration Manager console –
Under Software Library – Operating Systems – Task Sequences. Right-click on task sequence and select Edit.
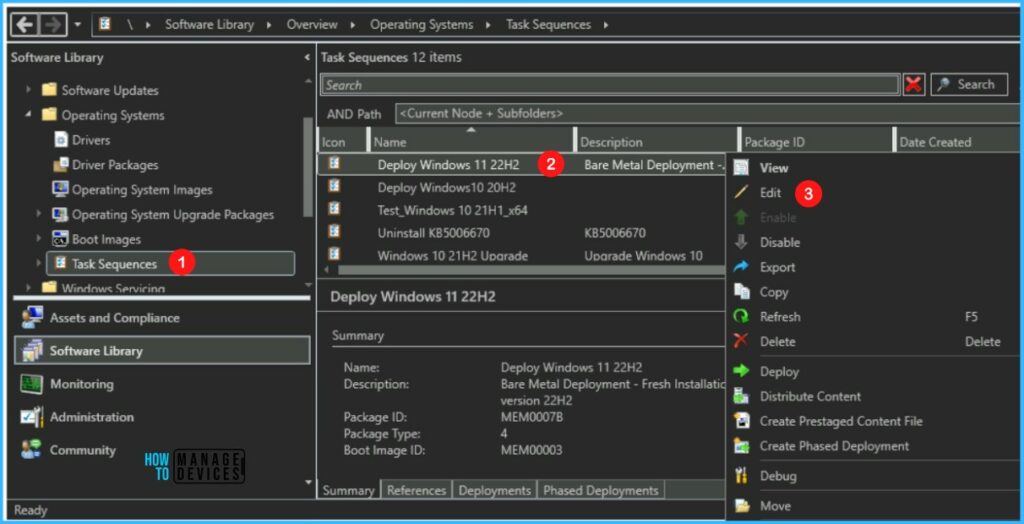
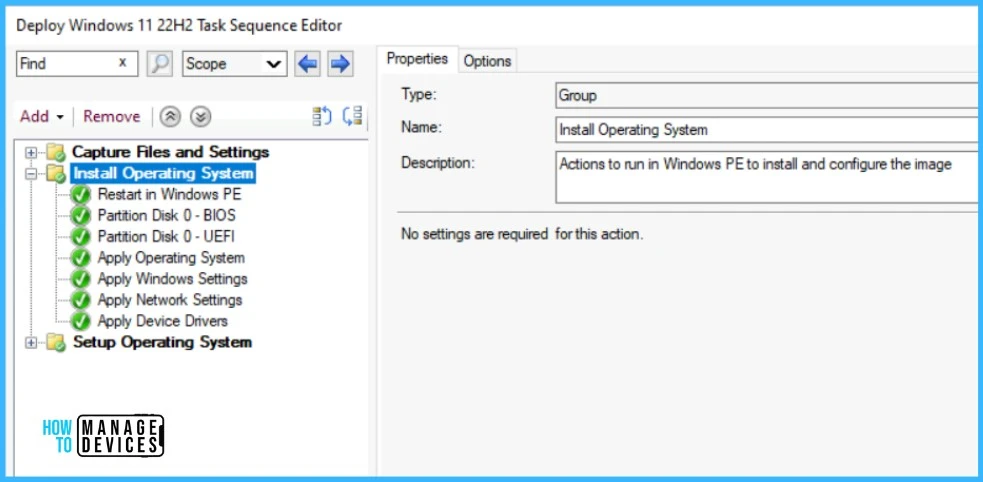
Edit the Task Sequence to add or remove settings – The Task Sequence uses these phases to determine which tasks must be completed. You can use the task sequence editor to –
- Add or remove steps and groups from the task sequence
- Change the order of the steps of the task sequence
- Set step options like whether the task sequence continues when an error occurs
- Add conditions to the steps and groups of a task sequence
Add Drivers
Let’s check the steps to Add Apply Driver Package Step to SCCM Task Sequence. Review drivers and applications that will be installed with the task sequence.
Before you deploy the task sequence, make sure the drivers are compatible. To Import Drivers, Create Driver packages, and Process to Integrate Driver package into Task Sequence.
You can refer to the following post to modify an existing task sequence –
- Add Install Application Step to SCCM Task Sequence
- Add Run PowerShell Script Step to SCCM Task Sequence
- Add Run Command Line Step to SCCM Task Sequence
Important⚠️- Review other settings added in Task Sequence. Make sure to apply all changes. Click Apply and OK, and close the task sequence editor.
Deploy Windows 11 22H2 Using SCCM
Use the following procedure to deploy a task sequence to the computers in a collection.
In the Task Sequence list, select the task sequence you have created, Right-click, and select Deploy.
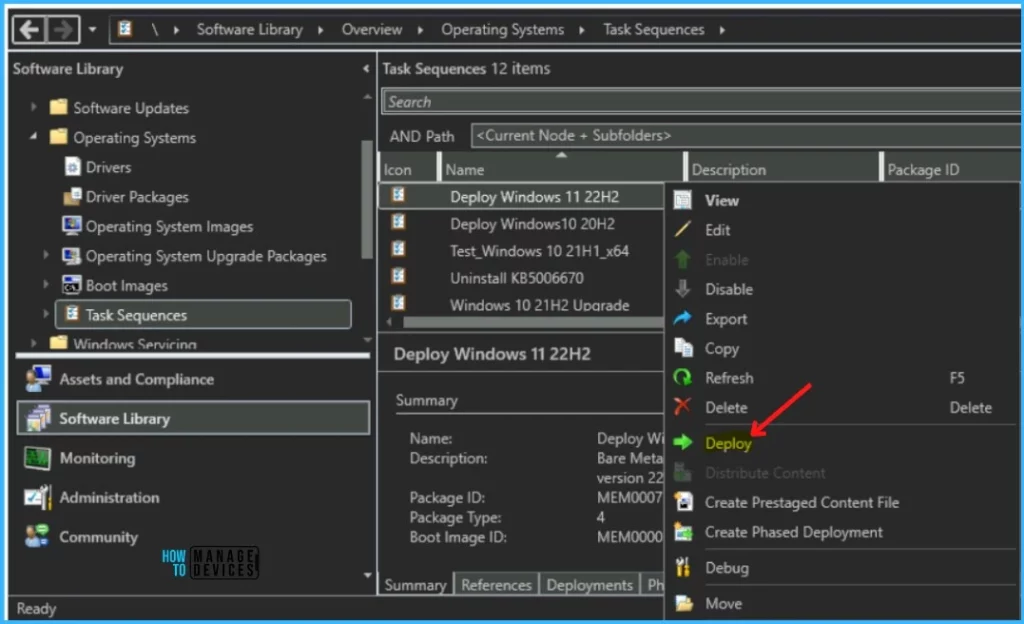
On the General, click Browse to select the device collection where you wish to perform the deployment.
Deploy to All Unknown Computers – Computers that are not managed by Configuration Manager or a computer not imported into Configuration Manager.
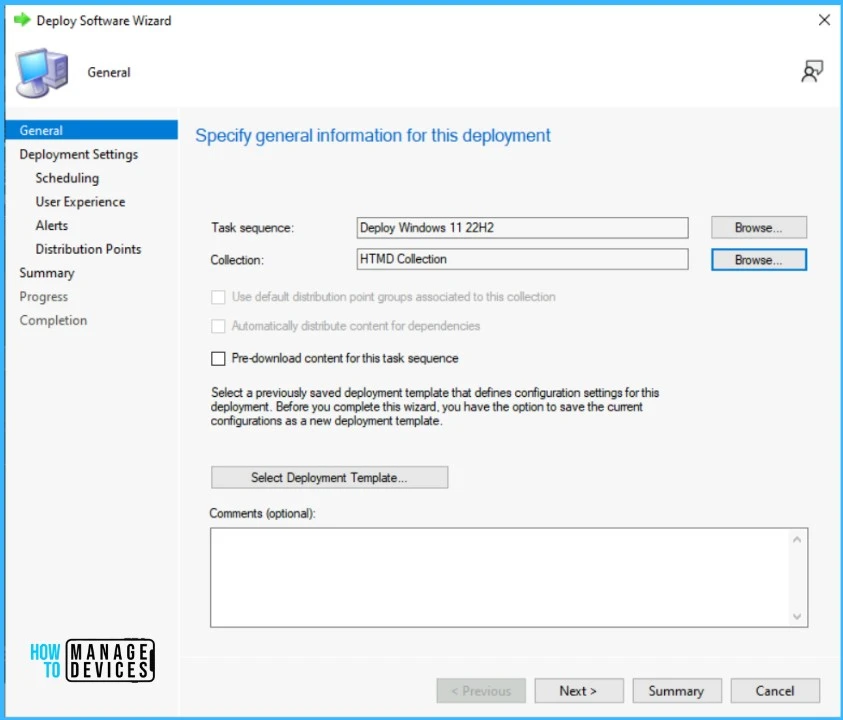
On the Deployment Settings, select the Purpose of the deployment.
Available – Available deployments require that the user is present at the destination computer. A user must press the F12 key to continue the PXE boot process. If a user isn’t present to press F12, the computer boots into the current OS, or from the next available boot device.

Required – Required deployments use PXE without any user intervention.

To use a PXE-initiated OS deployment, For the Make available to the following setting, select one of the following options –

Configuration Manager clients, media, and PXE
Only media and PXE
Only media and PXE (hidden)
Note – Use the Only media and PXE (hidden) setting for automated task sequence deployments. To have the computer automatically boot to the deployment without user interaction, select Allow unattended operating system deployment and set the SMSTSPreferredAdvertID variable as part of the media.

On the Scheduling tab, you can specify the schedule for this deployment. Click Next.
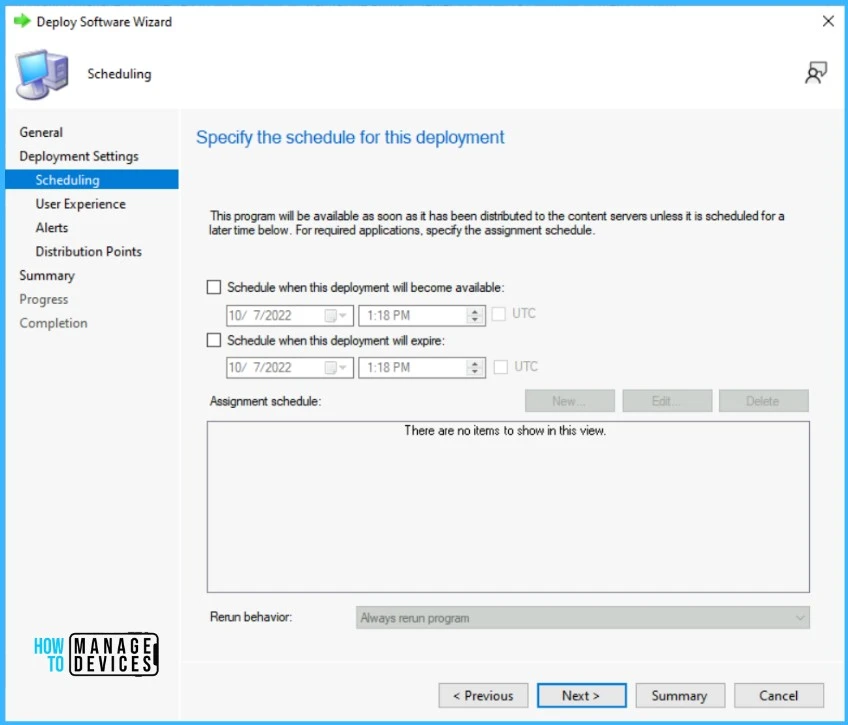
On the User Experience tab, leave the default selected options. Click Next.

On the Alerts page, leave it as default. Click Next.
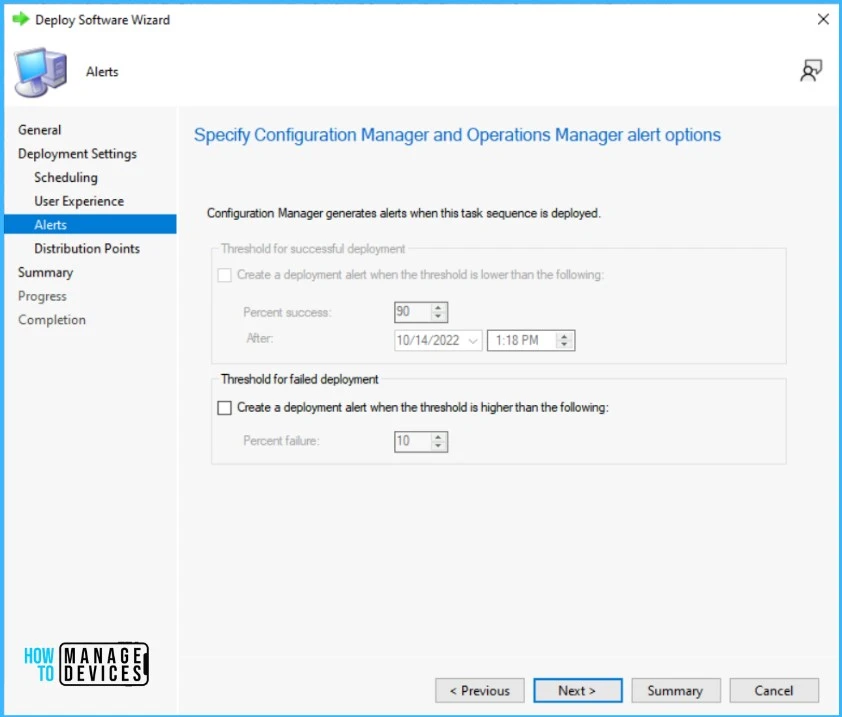
On the Distribution Points page, you can specify how clients interact with the DPs to retrieve content from reference packages. Click Next.

To understand the available options in the Distribution Points tab during task sequence deployment – SCCM Task Sequence Available Deployment Options in Distribution Points Tab | ConfigMgr
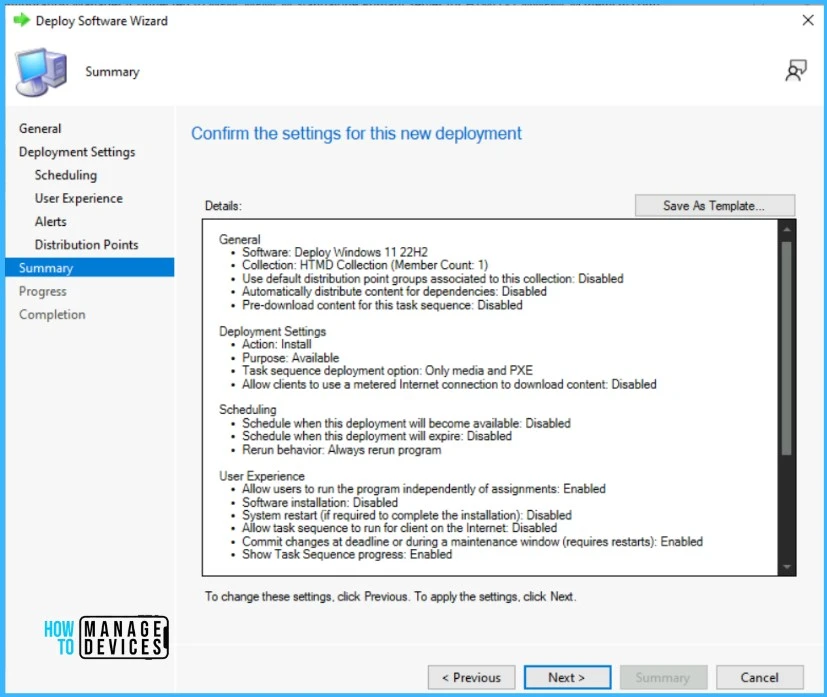
Review the selected settings and click Next.
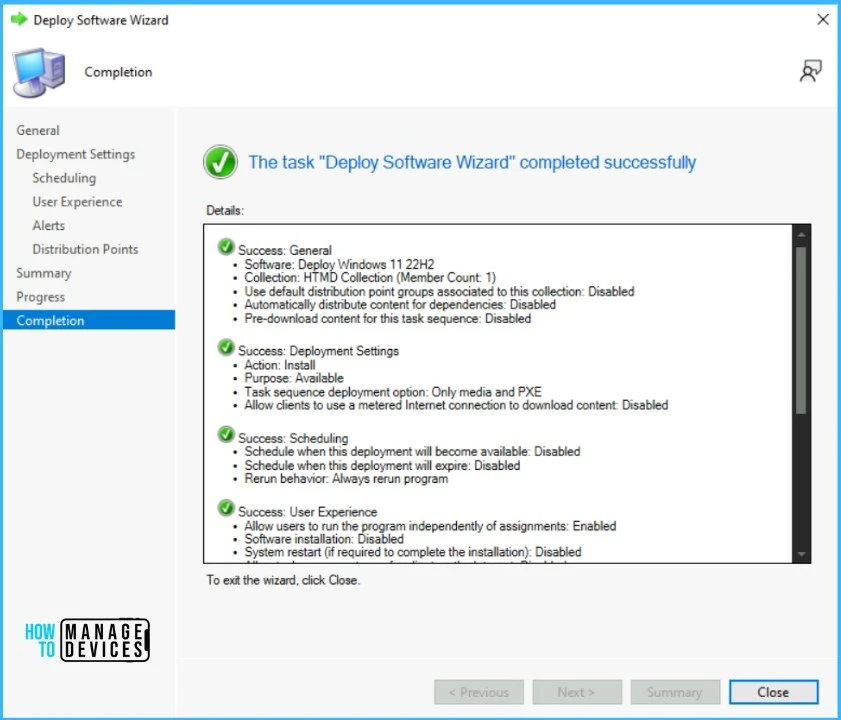
The deployment targeted successfully to the collection. Click Close to exit the wizard.
Results – Windows 11 22H2 Deployment
Different hardware models have different experiences for PXE. To boot to the network – UEFI-based devices typically use the key and BIOS-based devices use the key.
After the device successfully boots via PXE, the task sequence wizard appears. If you password-protect the media, the user has to enter the password on this welcome page. Click Next.

Select a task sequence to run: If you deploy more than one task sequence to the device, you see this page to select a task sequence.
Make sure to use a name and description for your task sequence that users can understand. Complete the Task Sequence Wizard by selecting deployed task sequence.
Click Next. The task sequence begins when the policy for the task sequence is downloaded, and the content location is verified.

Once you complete the Wizard, the deployment of the new operating system begins. When the task sequence runs, it displays the Installation progress window. Check more How to Improve SCCM Task Sequence Progress Bar End User Experience | ConfigMgr
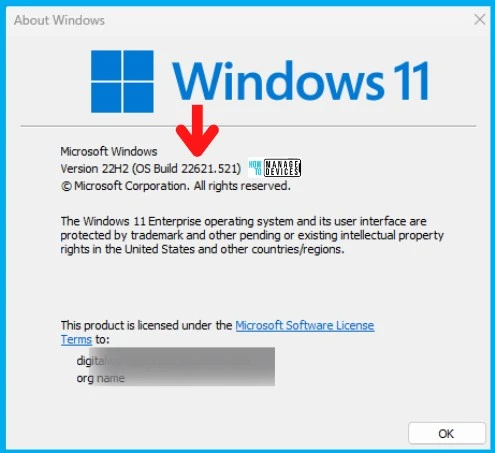
Please wait to complete the task sequence deployment. Sign in to the device with your domain or local credentials. Click Start, Type Winver, and Press Enter. You will see Windows 11 version 22H2 (OS Build 22621), was installed successfully.
Let’s quickly look at the Windows 11 build numbers and version numbers. The Windows 11 version build number starts at 22000. But the Windows 11 22H2 version is 10.0.22621.
| Windows 11 21H2 | New! – Windows 11 22H2 |
|---|---|
| 10.0.22000 | 10.0.22621 |
Troubleshooting – Deploy Windows 11 22H2 using SCCM
The SMSTS.log is one of the important log files that will help you troubleshoot installation issues related to Operating System Deployment (OSD) and fix those.
Learn how to read SMSTS.log effectively for troubleshooting SCCM OSD Task Sequence. You can also check SCCM OSD SMSTS Log File Reading Tips with the built-in log reader tool CMTrace.
- OSD Known Issues Troubleshooting Guide | SCCM | ConfigMgr
- ConfigMgr OSD Troubleshooting Known Issues Guide Part 2 | SCCM
