Intune
Microsoft Intune is the SaaS solution provided by Microsoft. Microsoft Intune is a cloud-based desktop and mobile device management tool. This supports Mac OS, iOS, Android, and Windows 10. This cloud solution is used as a modern management tool.
You can check out HTMD Community Intune Training from Free Intune Training 2023 blog post. Let’s learn about Intune Exam MD 102 Study Guide Starter Kit – Microsoft Intune Certification. Also, check out the Top 75 Latest Intune Interview Questions.
This MDM solution can be integrated with SCCM, Azure AD, and Active Directory. This place gives you a great opportunity Learn Microsoft Intune and become an expert with Intune.
This solution can be used to deploy UWP applications, Security policies, Configuration policies, WiFi profiles, PKI certificates, and so on.
This solution is future-proof When you take a look at the Desktop (43.29%) Vs. Mobile (52.29%) Vs. Tablet (4.42%) Market Share Worldwide for the last year, you could see that mobile devices are leaders. So, Mobile Device Management is very critical, and this is a new world of opportunities for IT Pros like us. From my perspective, learning this solution is very important for SCCM admins.
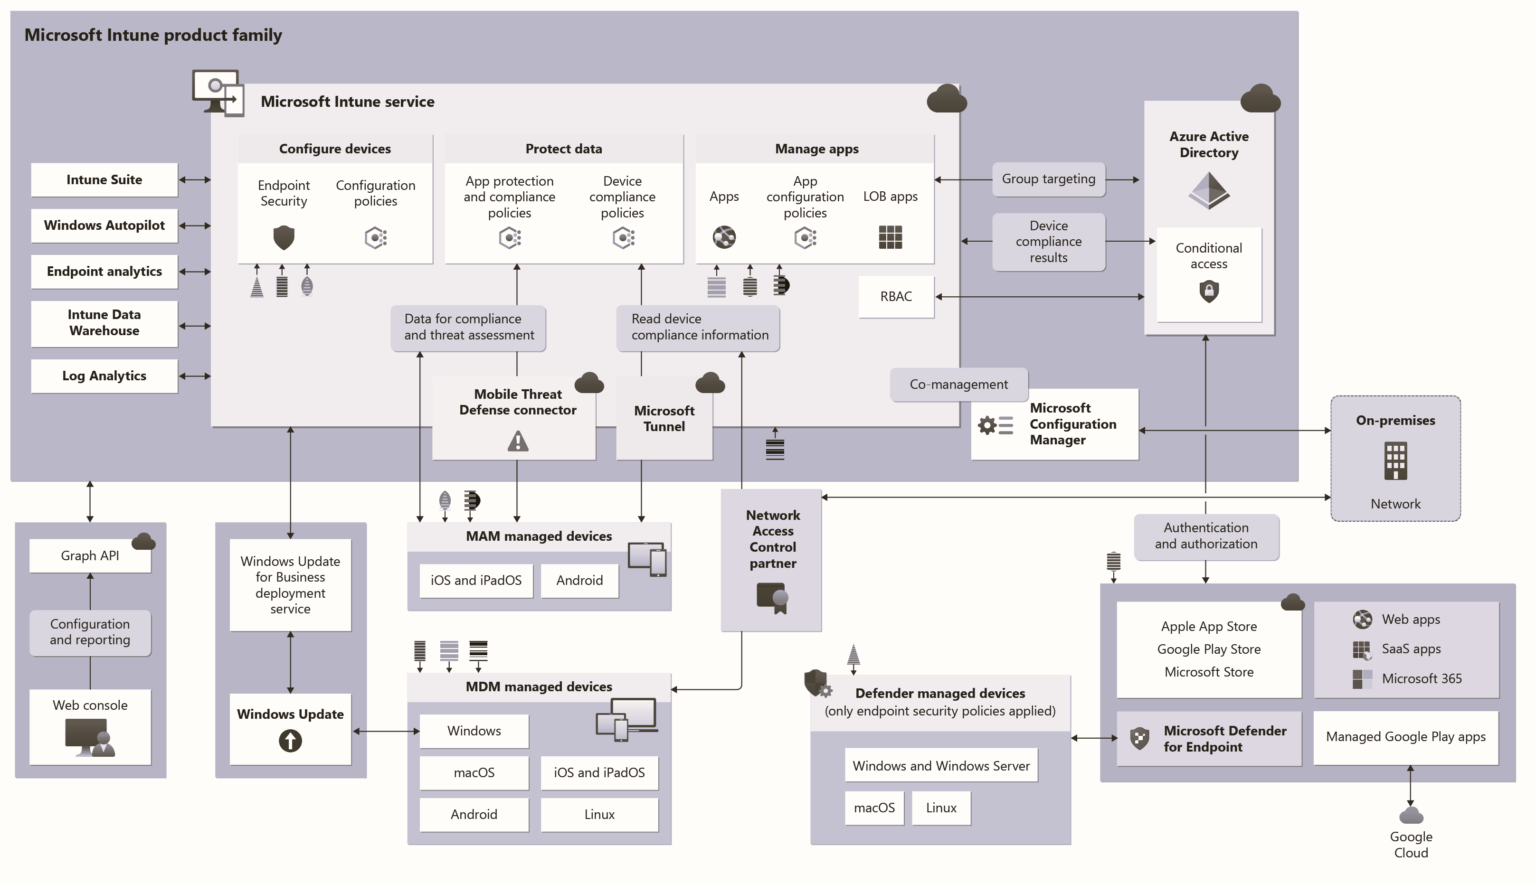
Intune is an enterprise mobility management (EMM) solution from Microsoft. The EMM provider helps to manage mobile devices, network settings, and other mobile services and settings. This solution is nothing but a combination of Device, Application, Information Protection, Endpoint Protection (antivirus software), and Security/Configuration policy management solution (SaaS) facilitated by Microsoft in the Cloud.
Additionally, this solution has a feature called compliance policy, which can be integrated with the Azure AD “Conditional Access” policy to restrict access to company resources.


