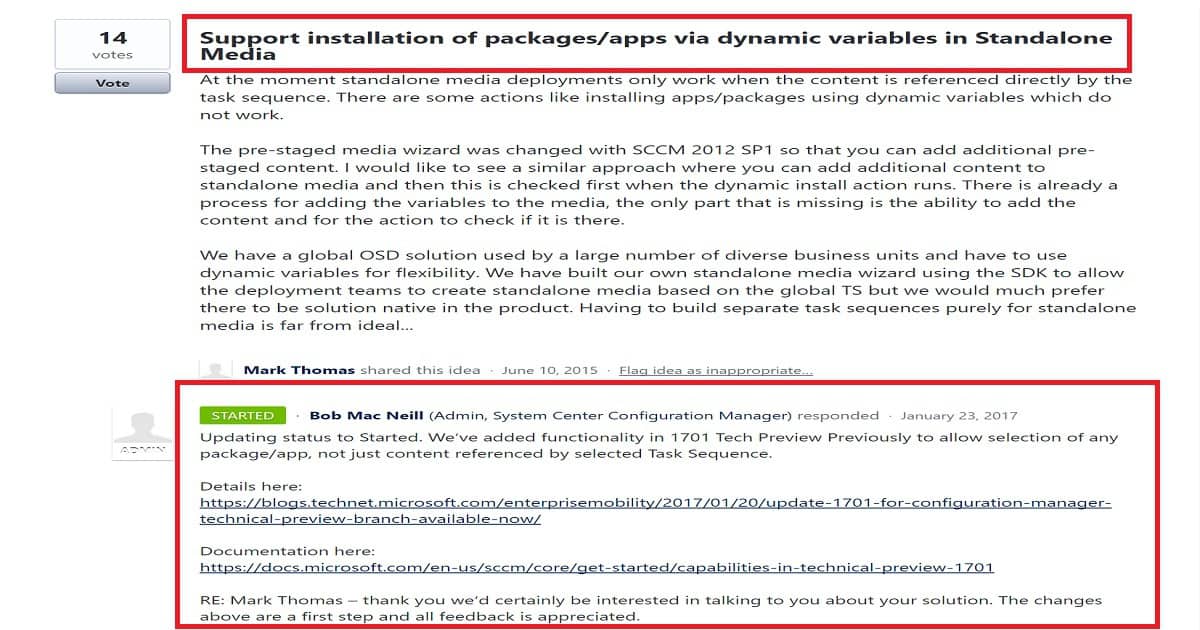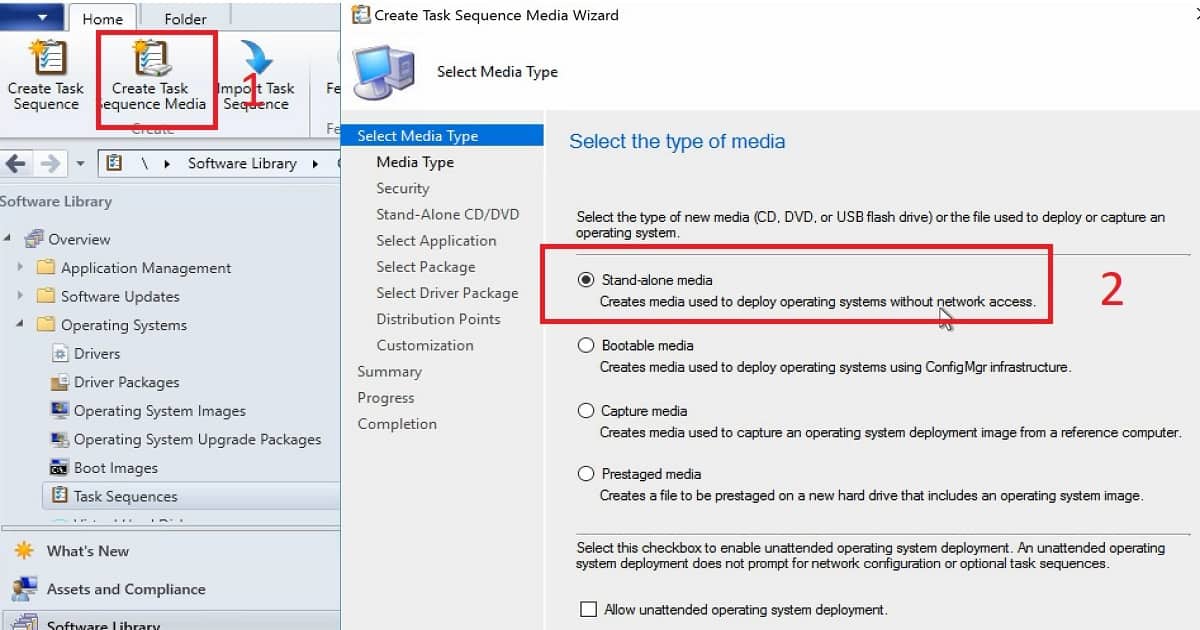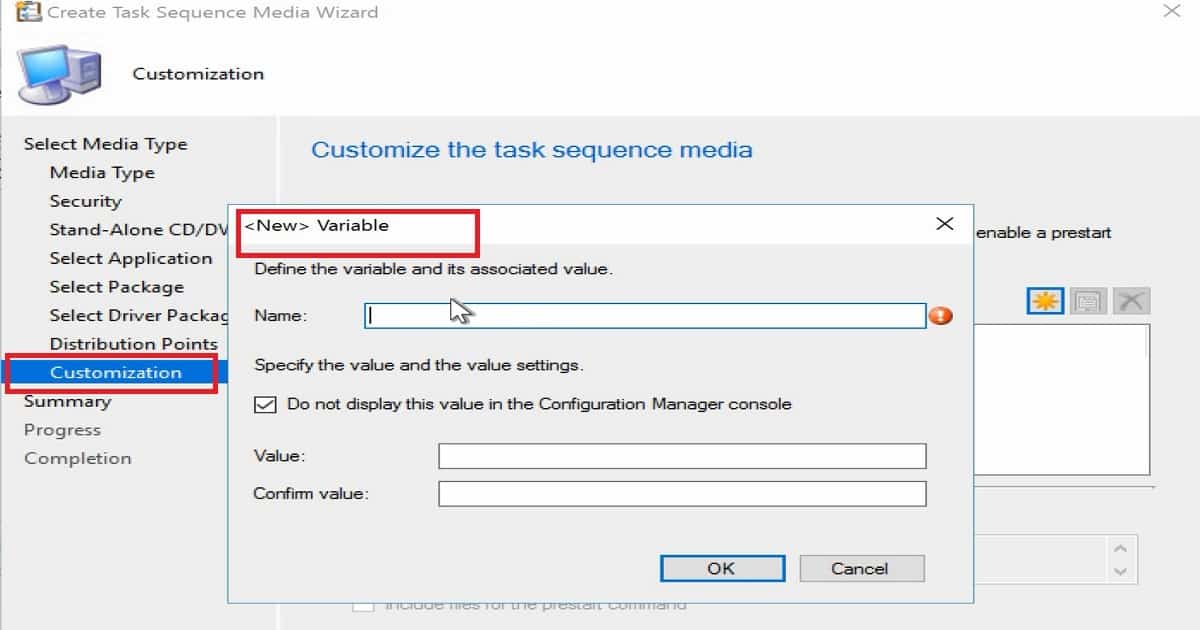

SCCM CB Preview 1706 Upgrade New Capabilities Overview Video 1

SCCM CB Preview 1706 Upgrade New Capabilities Overview Video

Let’s learn SCCM CB Preview 1706 Upgrade New Capabilities Overview Video. The SCCM team released the newest PREVIEW version of SCCM CB 1706. Most of us are waiting for the production release, which I hope will happen sometime next month.

Per my previous experience and analysis, not all newly introduced features were added to the production version. I expect the same thing might happen with the production version of SCCM CB 1706.

I don’t think all the new features introduced in the PREVIEW version of 1706 will make it to the production version of SCCM CB 1706. I’ll provide an SCCM CB Preview Version 1706 Upgrade and New Capabilities Overview Video guide in this post.

Downloading the SCCM CB 1706 preview version and upgrading from it to 1706 is straightforward. A similar process is explained in the following video step-by-step guide, “Step by Step Video Guide SCCM ConfigMgr CB TP 1705 Download and Upgrade.”

SCCM CB Preview 1706 Upgrade New Capabilities Overview Video – SCCM CB Primary Passive Site Server

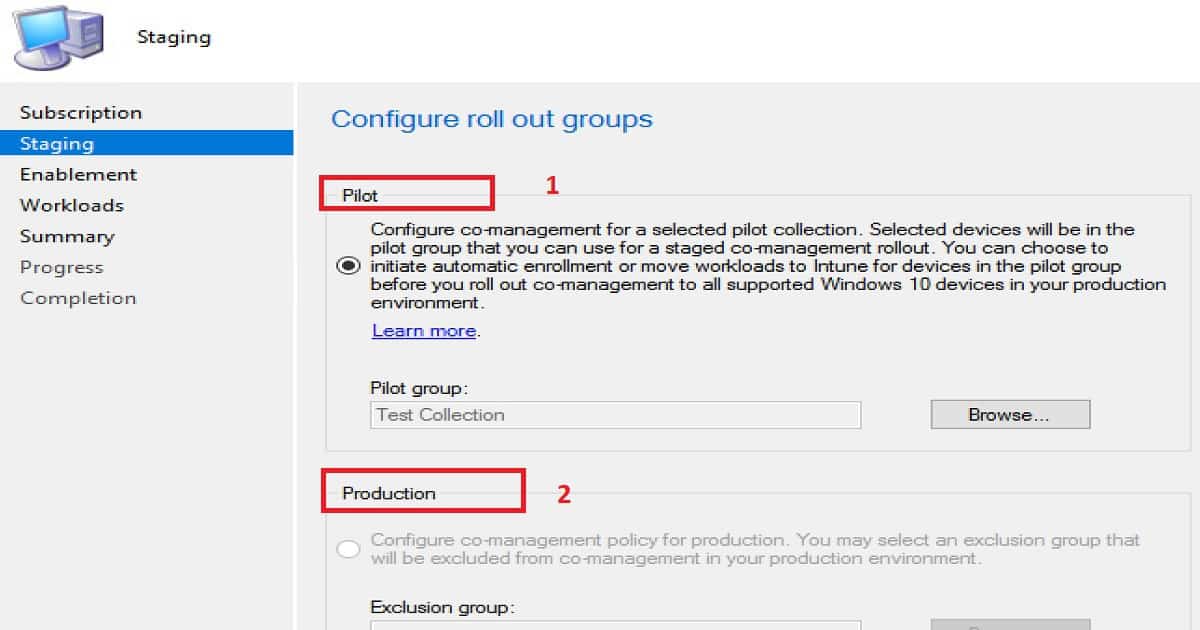
Site server role high availability – Now, you can create a passive primary server with the SCCM CB 1706 preview version, and this passive primary server will use the same SQL database. The passive SCCM primary server can’t write anything to the DB.

How do you create an SCCM CB Passive Primary server? Go to Administration > Site Configuration > Sites and start the Add Site System Roles Wizard in the console.

SCCM CB Preview 1706 Upgrade New Capabilities Overview Video - Fig.1
SCCM CB Preview 1706 Upgrade New Capabilities Overview Video – Fig.1

SCCM CB SUP and Boundary Group Improvements

It improved boundary groups for SCCM CB 1706 preview software update points (SUP). Fallback for SUPs now uses a configurable time for fallback to neighbour boundary groups, with a minimum of 120 minutes.

Independent of the fallback configuration, a client who attempts to reach the last software update point is used for 120 minutes. After failing to achieve its original server for two hours, the client switches to a shorter cycle for contacting a new SUP.

Trigger Compliance Notification Alerts from SCCM CB 1706

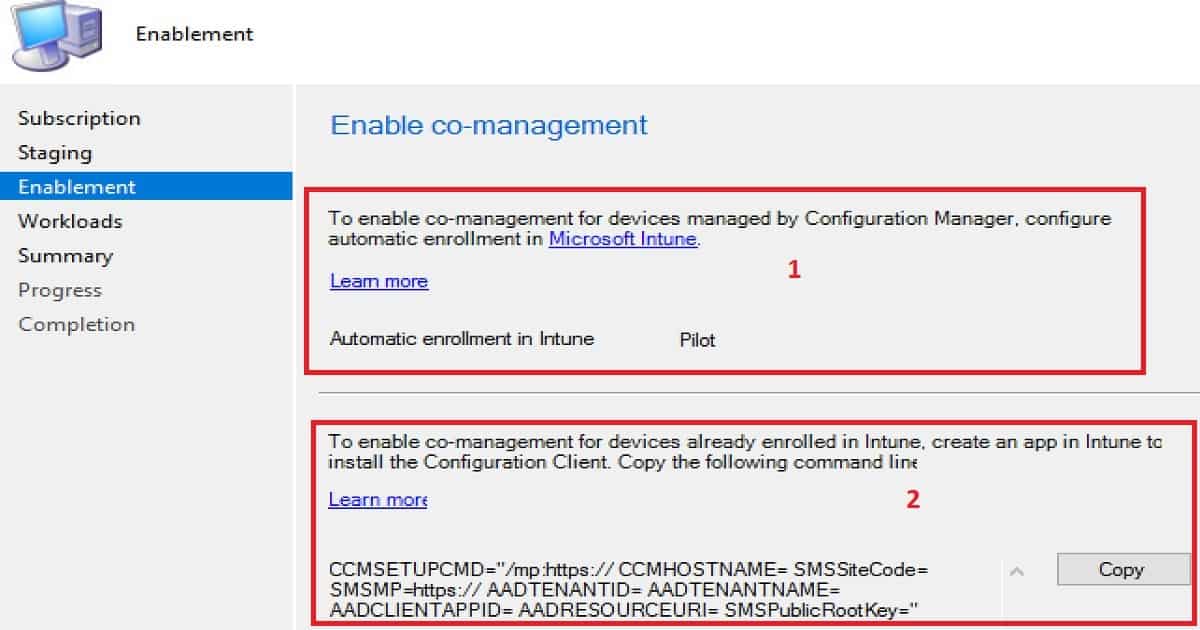
The device compliance policy has undergone some significant improvements. You can configure a time-ordered sequence of actions applied to devices that are out of compliance. For example, you can notify users of non-compliant devices via e-mail or mark those devices as non-compliant.

This can be done via \Assets and Compliance\Overview\Compliance Settings\Compliance Policies\Compliance Notification Templates.

NameSubjectCompany LogoCompany Name
ACN NotificationACN NotificationYesYes
SCCM CB Preview 1706 Upgrade New Capabilities Overview Video – Table 1
SCCM CB Preview 1706 Upgrade New Capabilities Overview Video - Fig.2
SCCM CB Preview 1706 Upgrade New Capabilities Overview Video – Fig.2

SCCM CB Compliance Policy Options for AAD Registration and Antimalware

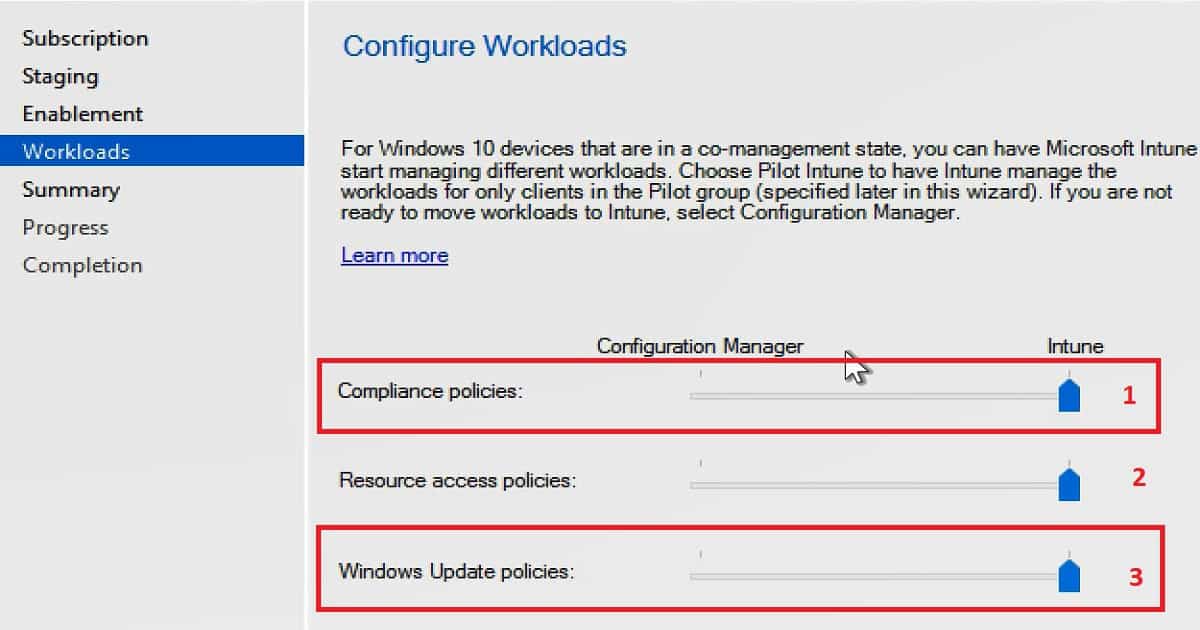
Also, I could see the new compliance policies for full SCCM clients, which can be used in conjunction with Conditional Access for Managed PCs. Those compliance policies are Azure Active Directory Registration and Antimalware presence.

SCCM CB Preview 1706 Upgrade New Capabilities Overview Video - Fig.3
SCCM CB Preview 1706 Upgrade New Capabilities Overview Video – Fig.3

Android and iOS Enrollment Restrictions are Available in SCCM CB 1706

Admins can now specify that users can not enroll personal Android or iOS devices in their hybrid environment, limiting enrollment to pre-declared company-owned or DEP-enrolled devices. You can configure this from an Intune subscription under Cloud Services.

New Client settings for Automatically Register the Domain Joined Devices to Azure AD (Default Client Policies)

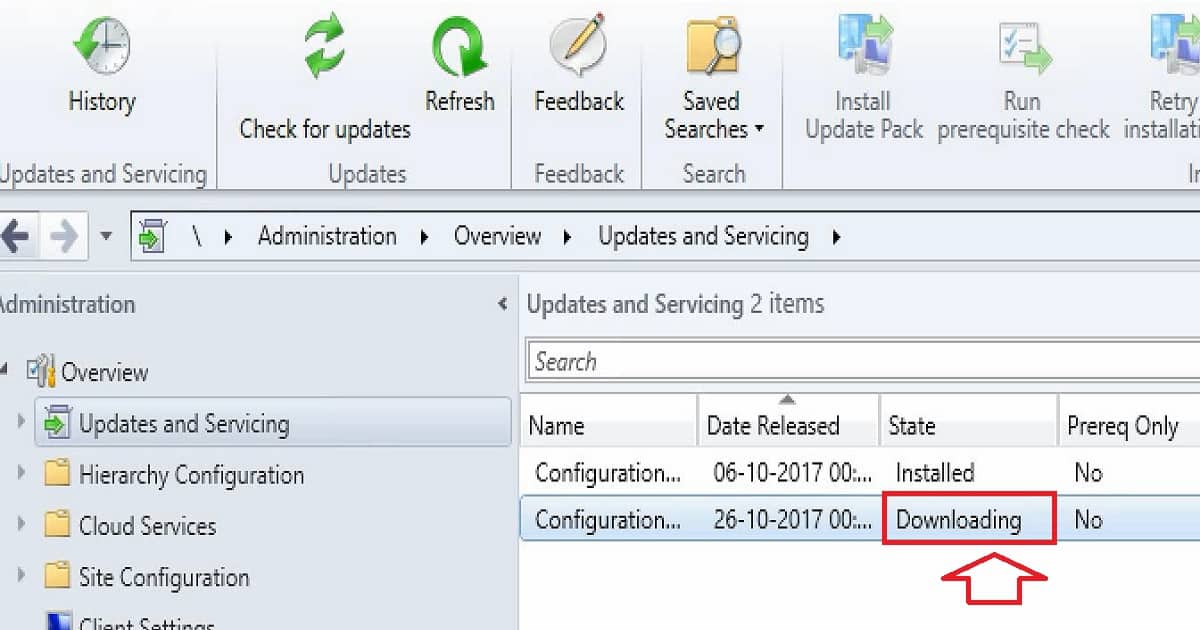
New client settings to Configuration Manager. You’ll find these in the Cloud Services section. These settings give you the following capabilities: Control which Configuration Manager clients can access a configured cloud management gateway. Automatically register Windows 10 domain-joined SCCM clients with Azure Active Directory.

SCCM CB Preview 1706 Upgrade New Capabilities Overview Video - Fig.4
SCCM CB Preview 1706 Upgrade New Capabilities Overview Video – Fig.4

Other Important Capabilities of SCCM CB 1706 PREVIEW Version

Let’s discuss the Other critical Capabilities of the SCCM CB 1706 PREVIEW version. The list below helps you show the Other critical Capabilities of the SCCM CB 1706 PREVIEW version.

  • Create and Run Scripts – Create and run PowerShell scripts from the SCCM console.
  • Device Health Attestation assessment for compliance policies for conditional access
  • Android for Work application management policy for copy-paste
  • Android and iOS enrollment restrictions
  • New mobile application management policy settings
  • New Windows configuration item settings
  • Cisco (IPsec) support for macOS VPN profiles
  • Support for Entrust certification authorities
  • Configure Windows Update for Business deferral policies
  • Manage Microsoft Surface driver updates
  • PXE network boot support for IPv6
  • Changes to the Azure Services Wizard to support Upgrade Readiness.
  • SCCM console Accessibility improvements
  • Specify a different content location for installing content and uninstalling content
  • Hide task sequence progress
  • Include trust for specific files and folders in a Device Guard policy

Resources

Capabilities in Technical Preview 1706 for SCCM CB

We are on WhatsApp now. To get the latest step-by-step guides, news, and updates, Join our Channel. Click here. HTMD WhatsApp.

Author

Anoop C Nair is Workplace Technology solution architect with 25+ years of experience in global enterprise organizations such as JP Morgan, Capgemini, etc. He is Microsoft Certified Trainer. Microsoft MVP from 2015 onwards for consecutive 11 years! He also conducts Intune and modern workplace tech training for enterprise organizations. He is Blogger, Speaker, and Founder of HTMD Community and HTMD Conference. His focus is on Device Management technologies such as Intune, Windows, Cloud PC, He writes about technologies like Intune, SCCM, Windows, Cloud PC, Windows, Entra, Microsoft Security.


Anoop C Nair is Workplace Technology solution architect with 25+ years of experience in global enterprise organizations such as JP Morgan, Capgemini, etc. He is Microsoft Certified Trainer. Microsoft MVP from 2015 onwards for consecutive 11 years! He also conducts Intune and modern workplace tech training for enterprise organizations. He is Blogger, Speaker, and Founder of HTMD Community and HTMD Conference. His focus is on Device Management technologies such as Intune, Windows, Cloud PC. He writes about technologies like Intune, SCCM, Windows, Cloud PC, Windows, Entra, Microsoft Security.
Intune MSI Application Deployment Video Guide Microsoft Endpoint Manager Step-by-Step Guide 2

Intune MSI Application Deployment Video Guide Microsoft Endpoint Manager Step-by-Step Guide

Let’s discuss the Intune MSI Application Deployment Video Guide Microsoft Endpoint Manager Step-by-Step Guide. How to upload and deploy MSI applications to Windows 10 machines with Intune via Azure console?  MSI application deployment could be one of the most used features in Intune (at least for a couple of years).

This video post will show the step-by-step process of MSI application deployment (Intune LOB application deployment).

NOTE! – Do not include the msiexec command or arguments, such as /i or /x, as they are automatically used. For more information, see Command-Line Options. If the .MSI file needs additional command-line options, consider using Win32 app management.

This post is also an end-to-end guide to creating MSI applications in Intune via the Azure portal. In the following post, “How to Deploy MSI App to Intune MDM Using SCCM CB and Intune“, I already blogged about MSI MDM deployment via the MDM channel. This will include:-

  • Uploading the MSI LOB app to Intune
  • Deployment or Assignment options
  • End-User Experience on Windows 10 machine
  • How to Troubleshooting with event logs and Pending Sync
  • How to get application installation status messages back to the Intune console

How to Deploy MSI LOB App from Intune Azure Console End-to-End Guide

In this video, you will learn how to deploy an MSI Line-of-Business (LOB) application using the Intune Azure Console from start to finish. The guide provides a detailed, step-by-step process covering everything you need.

Intune MSI Application Deployment Video Guide Microsoft Endpoint Manager Step-by-Step Guide – Video 1

Intune MSI Application Deployment Video Guide Microsoft Endpoint Manager Step-by-Step Guide – Upload MSI LOB Application to Intune

Uploading the MSI LOB app to Intune is a very straightforward process. Log in to the Azure portal, navigate via Microsoft Intune -> Mobile Apps -> Apps -> + Add button, and select the app type as “Line-of-Business app.” Click on “App package file,” browse to the MSI source file location, and click on the OK button, as you can see in the video here.

Intune MSI Application Deployment Video Guide Microsoft Endpoint Manager Step-by-Step Guide - Fig.1
Intune MSI Application Deployment Video Guide Microsoft Endpoint Manager Step-by-Step Guide – Fig.1

You must complete the “App information” section before you can proceed with uploading the MSI to Intune. There are a couple of mandatory fields. Command-line options are also available in this section. However, as I have experienced, you can also see in the video.

I have not used any silent switch for MSI, but by default, Intune/MDM on Windows 10 will install the app as silent (without any user interaction or input). Click on the ADD button to complete the MSI app creation process in Intune on the Azure portal.

Deployment or Assignment options of MSI Intune LOB application deployment

It would be best to wait until the application is successfully uploaded to Intune before you can create an assignment (or deployment). An assignment is a method that we use to deploy MSI applications to Windows 10 devices. You can deploy applications to Azure AD dynamic user groups or device groups. In this video/scenario, I used the AAD dynamic user group to target the MSI LOB apps.

  • More details are available in the video here. There are different deployment types available in Intune.

Available – The user needs to go into the company portal and trigger the installation.
Not applicable – Won’t get installed
Required – Forcefully get installed without any user interaction
Uninstall – Remove the application from the device
Available with or Without enrollment  – Mobile Application Management (MAM) without MDM enrollment scenarios.

Intune MSI Application Deployment Video Guide Microsoft Endpoint Manager Step-by-Step Guide - Fig.2
Intune MSI Application Deployment Video Guide Microsoft Endpoint Manager Step-by-Step Guide – Fig.2

End-User Experience on Windows 10 machine

Windows 10 machines will get the new application deployment policy once the assigned user is logged into that machine. What is the option to speed up the application deployment to the machines?  You need to sync with Intune services using the following method (manually).

You can go to “Settings—Access Work or School—Work or School Account—Info (click on this button)” and click on Sync. This will initiate a Windows 10 machine sync with Intune services, and after a successful sync, the machine will get the latest application policies.

How to Troubleshooting with Event Logs and Pending Sync

Unlike SCCM/ConfigMgr deployments, we don’t have log files to look at the application installation status via the MDM channel on Windows 10 machines. So, it would be best if you relied on the Company portal for troubleshooting the MSI application troubleshooting.

  • As you can see in the following picture, the installation is waiting for “Pending Sync.”
  • As mentioned above, you can immediately initiate a manual sync to kick-start the installation process.
  • Event logs – Windows Logs – Applications are where you can get the status of MSI application installation via MDM or Intune channel on to Windows 10 machine.
Intune MSI Application Deployment Video Guide Microsoft Endpoint Manager Step-by-Step Guide - Fig.3
Intune MSI Application Deployment Video Guide Microsoft Endpoint Manager Step-by-Step Guide – Fig.3

How to get application installation status messages back to the Intune console

To get the installation status of the MSI LOB apps to Intune on the Azure portal, you need to sync your work or school accounts with Intune services. The installation status will be blank in the Intune blade unless the device is synced with Intune after the application is installed on the Windows 10 machine.

Initiate thSyncnc via “Settings – Access Work or School – Work or School Account – Info (click on this button)” and click on  Sync. Once thSyncnc is completed successfully, you can try to check the Intune Device Install Status in Intune to check the status.

Intune MSI Application Deployment Video Guide Microsoft Endpoint Manager Step-by-Step Guide - Fig.4
Intune MSI Application Deployment Video Guide Microsoft Endpoint Manager Step-by-Step Guide – Fig.4

Reference:- 

We are on WhatsApp now. To get the latest step-by-step guides, news, and updates, Join our Channel. Click here. HTMD WhatsApp.

Author

Anoop C Nair is Workplace Technology solution architect with 25+ years of experience in global enterprise organizations such as JP Morgan, Capgemini, etc. He is Microsoft Certified Trainer. Microsoft MVP from 2015 onwards for consecutive 11 years! He also conducts Intune and modern workplace tech training for enterprise organizations. He is Blogger, Speaker, and Founder of HTMD Community and HTMD Conference. His focus is on Device Management technologies such as Intune, Windows, Cloud PC, He writes about technologies like Intune, SCCM, Windows, Cloud PC, Windows, Entra, Microsoft Security.
Anoop C Nair is Workplace Technology solution architect with 25+ years of experience in global enterprise organizations such as JP Morgan, Capgemini, etc. He is Microsoft Certified Trainer. Microsoft MVP from 2015 onwards for consecutive 11 years! He also conducts Intune and modern workplace tech training for enterprise organizations. He is Blogger, Speaker, and Founder of HTMD Community and HTMD Conference. His focus is on Device Management technologies such as Intune, Windows, Cloud PC. He writes about technologies like Intune, SCCM, Windows, Cloud PC, Windows, Entra, Microsoft Security.
Hyper-V Backup Step by Step Installation Configuration Video Guide Altaro Backup Guide 3

Hyper-V Backup Step by Step Installation Configuration Video Guide Altaro Backup Guide

Let’s learn Hyper-V Backup Step-by-Step Installation Configuration Video Guide Altaro Backup Guide. This post will show the details of the Hyper-V backup step-by-step installation and configuration guide. I have to build a hyper-v server 2016 with three VMs.

This is my new SCCM CB lab, and Altaro VM backup has been installed and configured on that server to take backup of my hyper-v VMs.

A future blog post will cover the restoration process of Hyper-v VMs from Altaro VM Backup. This blog post will cover the installation, configuration, VM backup, backup retention, and VM backup health check.

Recently, Altaro released Altaro VM Backup v7 with vSphere 6.5 and Windows Server 2016 support, concurrency update, and the new Cloud Management Console; more details. They have included other features into the latest Altaro VM backup v7 boot VM from Backup and Augmented Inline Deduplication. The new Unlimited Plus Edition also comes with a new online console.

Hyper-V Backup Step by Step Installation Configuration Video Guide Altaro Backup Guide

This version generally provides considerably increased backup concurrency per Hypervisor. With Altaro’s inline deduplication technology, the user can benefit from huge storage space savings and much better backup speeds.

Hyper-V Backup Step by Step Installation Configuration Video Guide Altaro Backup Guide - Fig.1
Hyper-V Backup Step by Step Installation Configuration Video Guide Altaro Backup Guide – Fig.1

Step1 – Connecting to Hyper-V and Discovering VMS

Hosts—This is the step where the Hyper-V machines were discovered via Altaro VM backup. I have an SCCM infrastructure setup with this Hyper-V lab, so Altaro was able to find the 3 VMs as part of the STEP 1 discovery.

STEP 2 – Setting up Backup locations for VM backups

Backup Locations—This is where we set up a backup location for each Hyper-V VM. You can provide a network location and external hard disk. Setting up a backup site is easy. Altaro backup automatically discovers the external hard disk or USBs connected to your Hyper-V server. You can drag and drop your VMs to a particular backup location, and that is it!

Hyper-V Backup Step by Step Installation Configuration Video Guide Altaro Backup Guide - Fig.2
Hyper-V Backup Step by Step Installation Configuration Video Guide Altaro Backup Guide – Fig.2

Scheduling backup tasks for Hyper-V VMs via Altaro Hyper-V backup is very easy. You can also set up a retention policy for Hyper-V VM backups according to your organizational requirements.

Advanced settings allow you to customize and skip IOS files from Hyper-V VM backups. If your organization requires encryption while backing up VMs, Altaro has an out-of-the-box setting to configure the encryption of VMs.

STEP 3 – Hyper-V VM Backup, Retention Schedules, and Reports

Step 3 is the last stage I will cover in this post. It involves backing up Hyper-V VMs using the Altaro backup solution. When you click on the “+” symbol on the right side of your VM and click on the “Take Backup” button, Altaro will send the instructions to the hypervisor. You can also schedule the Hyper-V VM backups to automate the backup process.

Hyper-V Backup Step by Step Installation Configuration Video Guide Altaro Backup Guide - Fig.3
Hyper-V Backup Step by Step Installation Configuration Video Guide Altaro Backup Guide – Fig.3

You can also check and verify the backup that has already been completed. The Schedule Test Drills and Test – Verify Backups options automate the validation of Hyper-V VM backups. Some helpful out-of-box reports will provide details about the Altaro Backup jobs completed.

Retention policies help automate deleting old Hyper-V VM backups on a particular schedule. In my testing, this is very useful for better storage management. Watch the video tutorial to learn more about Altaro services and file systems. Eight Altaro Services are running on the Hyper-V server.

Hyper-V Backup Step by Step Installation Configuration Video Guide Altaro Backup Guide - Fig.4
Hyper-V Backup Step by Step Installation Configuration Video Guide Altaro Backup Guide – Fig.4

Conclusion:-

This post covered installation, configuration, VM backup, backup retention, and VM backup health check. In a later post, I will cover the recovery options of the Altaro VM Backup solution in detail. Overall, I had a great user experience with the installation, configuration, and VM backup of Altaro VM Backup. The drag-and-drop options for VMs are my favorite option in Altaro VM backup. Stay tuned for the next post-restore topic.

We are on WhatsApp now. To get the latest step-by-step guides, news, and updates, Join our Channel. Click here. HTMD WhatsApp.

Author

Anoop C Nair is Workplace Technology solution architect with 25+ years of experience in global enterprise organizations such as JP Morgan, Capgemini, etc. He is Microsoft Certified Trainer. Microsoft MVP from 2015 onwards for consecutive 11 years! He also conducts Intune and modern workplace tech training for enterprise organizations. He is Blogger, Speaker, and Founder of HTMD Community and HTMD Conference. His focus is on Device Management technologies such as Intune, Windows, Cloud PC, He writes about technologies like Intune, SCCM, Windows, Cloud PC, Windows, Entra, Microsoft Security.
Anoop C Nair is Workplace Technology solution architect with 25+ years of experience in global enterprise organizations such as JP Morgan, Capgemini, etc. He is Microsoft Certified Trainer. Microsoft MVP from 2015 onwards for consecutive 11 years! He also conducts Intune and modern workplace tech training for enterprise organizations. He is Blogger, Speaker, and Founder of HTMD Community and HTMD Conference. His focus is on Device Management technologies such as Intune, Windows, Cloud PC. He writes about technologies like Intune, SCCM, Windows, Cloud PC, Windows, Entra, Microsoft Security.
Microsoft MVP Community Connect India

My Experience of Microsoft MVP Community Connect 2017 India Most Valuable Professional

My Experience of Microsoft MVP Community Connect 2017 India Most Valuable Professional. Last week, I attended Microsoft MVP Community Connect 2017 India in Coorg. Coorg is located on the southern side of India and is also known as “The Scotland of India.”

This is a global event in full swing. Previously, it was called “MVP Open Days.” Last year, it was conducted in Hyderabad. These events are an opportunity for MVP communities to gather together, learn new skills, and celebrate everything being an MVP has to offer.

It was a great experience for me to meet Microsoft leaders. Interacting with community leaders from Microsoft helped me understand the strategies. The best part of the event was getting the chance to interact with fellow MVPs.

Coorg is an excellent place to be around this time of the year. The climate was just superb; it was drizzling. We didn’t have proper mobile network connections, so it was disconnected from the world. But, we had a Wi-Fi connection available, so it was ok for an emergency. Moreover, the resort was very nice in the middle of the forest.

Microsoft MVP Community Connect India 2017

In this video, you will learn all the details about the Microsoft MVP Community Connect India 2017 event. Attendees interacted with Microsoft leaders and fellow MVPs, gaining insights into cloud computing, Azure, and community building.

My Experience of Microsoft MVP Community Connect 2017 India Most Valuable Professional – Video 1

My Experience of Microsoft MVP Community Connect 2017 India Most Valuable Professional

Those interactions and networking will help me understand their point of view about the cloud, Azure, Openness, etc. I learned a lot from each of my fellow MVPs, like how they conduct community events, write blog posts, create video tutorials, etc.

MVP Connect 2017 Coorg My Experience of Microsoft MVP Community Connect 2017 India | Most Valuable Professional
My Experience of Microsoft MVP Community Connect 2017 India | Most Valuable Professional

Microsoft MVP Community Connect 2017 allowed me to learn new things.

  • 1. Different Strokes – Virtual Communication Cues
  • 2. Stories Are Us – Written Communication Cues
  • 3. Improvise and Improve – Spoken (social) Communication Cues

We are on WhatsApp now. To get the latest step-by-step guides, news, and updates, Join our Channel. Click here. HTMD WhatsApp.

Author

Anoop C Nair is Workplace Technology solution architect with 25+ years of experience in global enterprise organizations such as JP Morgan, Capgemini, etc. He is Microsoft Certified Trainer. Microsoft MVP from 2015 onwards for consecutive 11 years! He also conducts Intune and modern workplace tech training for enterprise organizations. He is Blogger, Speaker, and Founder of HTMD Community and HTMD Conference. His focus is on Device Management technologies such as Intune, Windows, Cloud PC, He writes about technologies like Intune, SCCM, Windows, Cloud PC, Windows, Entra, Microsoft Security.
Anoop C Nair is Workplace Technology solution architect with 25+ years of experience in global enterprise organizations such as JP Morgan, Capgemini, etc. He is Microsoft Certified Trainer. Microsoft MVP from 2015 onwards for consecutive 11 years! He also conducts Intune and modern workplace tech training for enterprise organizations. He is Blogger, Speaker, and Founder of HTMD Community and HTMD Conference. His focus is on Device Management technologies such as Intune, Windows, Cloud PC. He writes about technologies like Intune, SCCM, Windows, Cloud PC, Windows, Entra, Microsoft Security.
Differences Between Intune Enrollment Restriction Device Restriction

Key Takeaways

  • Enrollment Restrictions control whether a device can enroll into Intune.
  • Device Restriction Profiles manage settings on devices after enrollment.
  • Enrollment Restrictions help control device platforms, ownership types, OS versions, and device limits.
  • Device Restriction Profiles configure security, hardware, browser, privacy, and user experience settings.

Let’s discuss the Differences Between the Intune Enrollment Restriction and Device Restriction. These policies manage device settings and user experiences by enabling, disabling, or configuring features such as browsers, security settings, data sharing, and system functionality. Understanding the differences between these policy types helps administrators implement effective device management and security controls. Enrollment Restrictions control whether a device is allowed to enroll into Intune.

Table of Contents

Differences Between Intune Enrollment Restriction Device Restriction

If a device does not meet the enrollment requirements, it is prevented from joining the Intune management environment. Device Restriction Profiles, on the other hand, are configuration policies applied after enrollment. How to Restrict Personal Android Devices from Enrolling into Intune post helps you to provide detailed instructions on restricting personal Android devices from enrolling into Intune using Endpoint Manager (MEM).

It covers the steps necessary to configure enrollment restrictions, ensuring that only corporate-owned devices can be enrolled and managed through Intune. Device restrictions are entirely different from Enrollment restrictions. Both options have different use cases, which will be explained in this post.

Differences Between Intune Enrollment Restriction Device RestrictionEnrollment Device Platform Restrictions

Intune Device restriction profiles (Enrollment Device Platform Restrictions) are policies similar to GPO from the traditional device management world. Most enterprise organizations use GPO to restrict corporate-owned devices. These are security policies that need to be applied to devices. Intune Device restriction policies control various mobile device settings and features (iOS, Android, macOS, and Windows 10).

Enrollment device platform restrictions make more sense. Navigate to Devices – Enrollment – Device Platform Restrictions.

Differences Between Intune Enrollment Restriction Device Restriction -Fig.1
Differences Between Intune Enrollment Restriction Device Restriction – Fig.1

This type of policy could apply to different categories, including security, browser, hardware, and data-sharing settings. For example, you could create a device restriction profile policy that prevents Windows users from sharing the internet or using Cortana, etc. Intune Device Restriction profiles can be deployed to specific users/devices in AAD groups, whereas Intune Enrolment restriction policies can’t be deployed to specific user/device groups in Azure AD. The following section of this post provides more details.

  • From the Enrollment page, select Device platform restriction to configure which platforms, ownership types, and operating system versions are allowed to enroll into Intune.
  • These restrictions are evaluated during the enrollment process and can help organizations block unsupported devices or restrict enrollment to corporate-owned devices only.
The Device Platform Restrictions policy allows administrators to
Allow or block specific device platforms.
Restrict personal device enrollment.
Configure minimum and maximum OS versions.
Control enrollment based on device ownership.
Differences Between Intune Enrollment Restriction Device Restriction – Table.1
Differences Between Intune Enrollment Restriction Device Restriction -Fig.2

Intune Device Limit Restrictions

Enrollment is the first part of Mobile Device Management. Why do we need to enroll a mobile device into Intune? Enrollment is the first step for management. When a device is enrolled in Intune, they have issued an MDM certificate, which that device then uses to communicate with the Intune service.

In several scenarios, we need to block employees from enrolling their devices in the corporate management platform. You want to block devices not secured enough to enroll in Intune, such as personal devices. Also, we could block devices with lower OS versions. How is this possible from Intune? Difference Between Intune Enrollment Restriction Device Restriction Profile | Configuration Manager ConfigMgr.

  • Navigate to Microsoft Intune >Enroll Devices>Enrollment device limit restrictions. You will see two Intune enrollment restriction policies.
Differences Between Intune Enrollment Restriction Device Restriction - Fig.3
Differences Between Intune Enrollment Restriction Device Restriction- Fig.3
Intune Enrollment Restriction Policies
Device Type Restrictions
Device Limit Restrictions
Differences Between Intune Enrollment Restriction Device Restriction Profile – Table 2

Device Type restriction is where we can define which platforms, versions, and management types can enroll. So, all other devices are blocked from Intune enrollment. The only problem with Intune enrollment restrictions I can think of is that device type restrictions in Intune are deployed to “All Users, ” we can’t deploy or assign Intune enrollment restriction policies to “specific user group.” At the moment, the device type restrictions policies are tenant-wide configurations.

  • This policy is useful for preventing excessive device enrollments and maintaining better control over managed devices within the organization.
  • From the Enrollment page, select Device limit restriction to view or create enrollment limit policies.
  • The Device Limit Restrictions page displays all configured policies along with their assigned device limits. Administrators can create multiple policies and assign them to different user groups based on organizational requirements.
Differences Between Intune Enrollment Restriction Device Restriction - Fig.4
Differences Between Intune Enrollment Restriction Device Restriction – Fig.4

Need Further Assistance or Have Technical Questions?

Join the LinkedIn Page and Telegram group to get the latest step-by-step guides and news updates. Join our Meetup Page to participate in User group meetings. Also, join the WhatsApp Community  and the Whatsapp channel to get the latest news on Microsoft Technologies. We are there on Reddit as well.

Author

Anoop C Nair is a Workplace Technology solution architect with 25+ years of experience. Microsoft Certified Trainer. Microsoft MVP from 2015 onwards for consecutive 11+ years! He is a blogger, Speaker, and Founder of HTMD Community and HTMD Conference. His main focus is on Device Management technologies like Intune, Windows, and Cloud PC. He writes about technologies like Intune, SCCM, Windows, Cloud PC, Entra, and Microsoft Security.

Anoop C Nair is Workplace Technology solution architect with 25+ years of experience in global enterprise organizations such as JP Morgan, Capgemini, etc. He is Microsoft Certified Trainer. Microsoft MVP from 2015 onwards for consecutive 11 years! He also conducts Intune and modern workplace tech training for enterprise organizations. He is Blogger, Speaker, and Founder of HTMD Community and HTMD Conference. His focus is on Device Management technologies such as Intune, Windows, Cloud PC. He writes about technologies like Intune, SCCM, Windows, Cloud PC, Windows, Entra, Microsoft Security.
How to Setup Android Work Support Step by Step Guide Microsoft Intune 4

How to Setup Android Work Support Step by Step Guide Microsoft Intune

Let’s learn how to Setup Android Work Support Step by Step Guide Microsoft Intune. Google’s strategic approach is to support management only via the Android Work channel, and Microsoft Intune’s strategy is to help Android work. This post will show how to set up Android work support in Intune portal.

Latest Post How To Configure Intune Enrollment Setup For Android Enterprise Device Management – HTMD Blog #2 (howtomanagedevices.com)

I have blogged about enrolling for Android Work Management via Intune: “Intune How to Enroll Android for Work Supported Devices for Management.” The video embedded in the above post explains the process of enabling Android Work support in the Intune Silverlight portal.

As you can see in the embedded video guide attached to this post, we will learn how to unbind or change the Gmail/Google account we used to set up Android work support in the Intune Azure portal. Once the existing Gmail account has been removed, we can use a different Gmail account to configure or set up Android Work support in the Intune Azure console.

How to Unbind Android Work Account from Intune Azure Portal

We must unbind the account from the Intune Azure console to change the Setup Android Work Google account. The Unbind button in Intune Azure removes support for Android Work enrollment and eliminates the relationship between the Android work account Gmail and Intune.

I have seen some delay in unbinding the Gmail account from the Intune blade in the Azure portal. As you can see in the video here, I removed the Gmail account from the Android work setting in the Intune blade in the Azure portal, but it took 2 minutes for these changes to reflect. However, the removal of Android Work was immediately reflected on the Intune Silverlight portal.

How to Setup Android Work Support Step by Step Guide Microsoft Intune - Fig.1
How to Setup Android Work Support Step by Step Guide Microsoft Intune – Fig.1

Setup Android Work Support in Intune Azure Portal

The configuration or setup of Android Work support in the Intune Azure portal is very similar to that in the Silverlight portal. You need to click the Configure button to open a pop-up where you can log in with a new Gmail or Android Work account. The Google configuration wizard will help you set up the connection between Intune and Google APIs like Google Play for Work, Android Work management, etc.

Microsoft Intune
Enrollment
Android for Work Enrollment
How to Setup Android Work Support Step by Step Guide Microsoft Intune – Table 1
How to Setup Android Work Support Step by Step Guide Microsoft Intune - Fig.2
How to Setup Android Work Support Step by Step Guide Microsoft Intune – Fig.2

Setting up Android Work Enrollment & Management via Intune

Android for Work enrollment settings are the same as those in the Intune Silverlight console. In the Intune Azure portal, we have three options for setting up Android work enrollment.

1. Manage all devices as Android – This is opposite to Google’s strategic approach regarding managing the Android devices
2. Manage supported devices as Android for Work—As per my testing, all Android 6.0 and above devices are supported for Android work enrollment and management via Intune. I have a blog post that explains A4W supportability, “Intune Entry Level Low-Cost Device Support for Android for Work Enrollment.” Hence, this is my best bet option for enrollment.
3. Manage supported devices for users only in these groups, such as Android Work. This could be used in the testing or pilot process if your organization doesn’t have a test Intune environment.

How to Setup Android Work Support Step by Step Guide Microsoft Intune - Fig.3
How to Setup Android Work Support Step by Step Guide Microsoft Intune – Fig.3

We are on WhatsApp now. To get the latest step-by-step guides, news, and updates, Join our Channel. Click here. HTMD WhatsApp.

Author

Anoop C Nair is Workplace Technology solution architect with 25+ years of experience in global enterprise organizations such as JP Morgan, Capgemini, etc. He is Microsoft Certified Trainer. Microsoft MVP from 2015 onwards for consecutive 11 years! He also conducts Intune and modern workplace tech training for enterprise organizations. He is Blogger, Speaker, and Founder of HTMD Community and HTMD Conference. His focus is on Device Management technologies such as Intune, Windows, Cloud PC, He writes about technologies like Intune, SCCM, Windows, Cloud PC, Windows, Entra, Microsoft Security.

Anoop C Nair is Workplace Technology solution architect with 25+ years of experience in global enterprise organizations such as JP Morgan, Capgemini, etc. He is Microsoft Certified Trainer. Microsoft MVP from 2015 onwards for consecutive 11 years! He also conducts Intune and modern workplace tech training for enterprise organizations. He is Blogger, Speaker, and Founder of HTMD Community and HTMD Conference. His focus is on Device Management technologies such as Intune, Windows, Cloud PC. He writes about technologies like Intune, SCCM, Windows, Cloud PC, Windows, Entra, Microsoft Security.
SCCM ConfigMgr CB Download Upgrade Step by Step Guide Configuration Manager Intune 5

SCCM ConfigMgr CB Download Upgrade Step by Step Guide Configuration Manager Intune

Discuss the SCCM ConfigMgr CB Download Upgrade Step by Step Guide Configuration Manager Intune. This Saturday, the Microsoft SCCM team released the latest technical preview.

I blogged about the two exciting features of the SCCM ConfigMgr CB version in the post “SCCM ConfigMgr AAD User Discovery and Client Authentication with Cloud Identities.”

This is not the production version of the SCCM ConfigMgr CB version. You should not install this version of SCCM in a production environment. Technical preview versions of SCCM CB will get released every month.

I recommend that SCCM admins install the TP version of SCCM CB in their lab environment so that they can keep up with the new features that are enabled in every TP release.

Step by Step How to SCCM ConfigMgr CB TP 1705 Download and Upgrade Video Guide

In the video titled “Step by Step How to SCCM ConfigMgr CB TP 1705 Download and Upgrade Video Guide,” you will find a detailed tutorial on downloading and upgrading to the (SCCM) Current Branch Technical Preview 1705. The guide walks you through the entire upgrade process, ensuring a smooth transition from previous versions.

SCCM ConfigMgr CB Download Upgrade Step by Step Guide Configuration Manager Intune – Video 1

SCCM ConfigMgr CB Download Upgrade Step by Step Guide Configuration Manager Intune

SCCM CB TP 1705 comes with loads of new features, and I will discuss some of them in detail in upcoming blog posts. In this post, we will discuss how I completed the download and installation of SCCM ConfigMgr CB TP 1705.

SCCM ConfigMgr CB Download Upgrade Step by Step  Guide Configuration Manager Intune - Fig.1
SCCM ConfigMgr CB Download Upgrade Step by Step Guide Configuration Manager Intune – Fig.1

You can refer to the video here or the embedded at the start of this post. In this post, the download and upgrade of the SCCM ConfigMgr CB TP version have been segregated into SIX parts. As you can see in the picture below, you may need to start the download (Available to Download).

  1. SCCM ConfigMgr CB TP 1705 – Download of the content
  2. SCCM ConfigMgr CB TP 1705 – Available to Install
  3. SCCM ConfigMgr CB TP 1705 – Pre-Requisite checks
  4. SCCM ConfigMgr CB TP 1705 – Installation Process
  5. SCCM ConfigMgr CB TP 1705 – Post Installation Steps
  6. SCCM ConfigMgr CB TP 1705 – Console Upgrades

SCCM ConfigMgr CB TP 1705 – Download of the Content

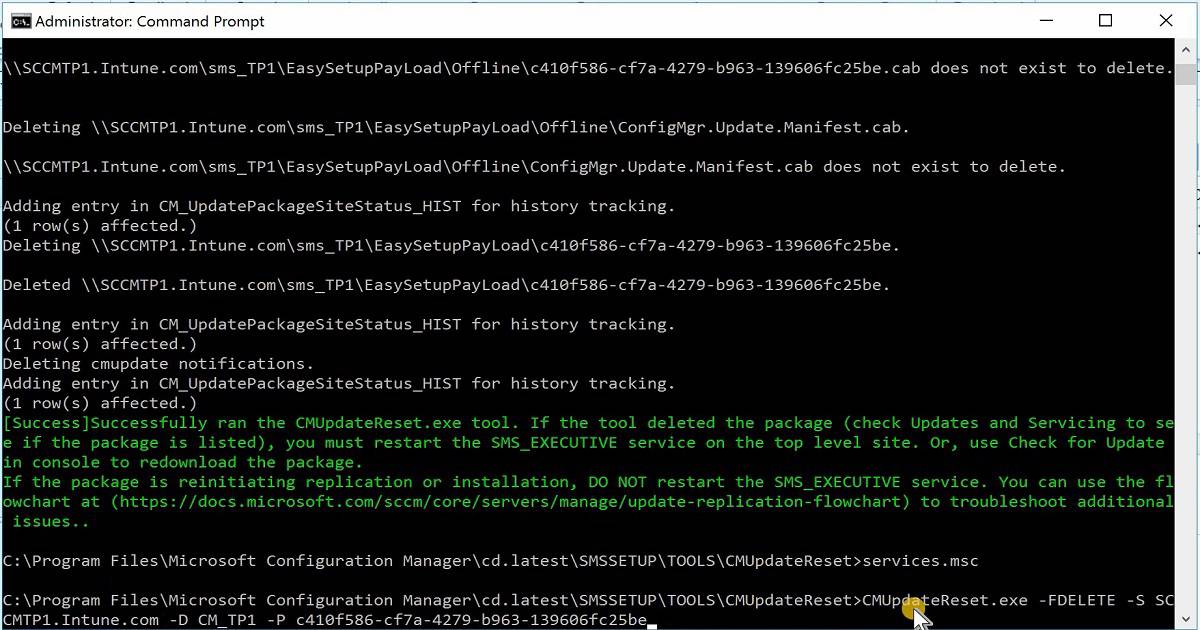
Download SCCM CB 1705 content from the Microsoft content server. You can check the content download status from the log file called DMPDownloader.log. Also, the content status can be analyzed via Ethernet connection via Task Manager – Performance.

In addition to these, you can check the cab file size from the folder “EasySetupPayload.” The SCCM CB installation video guide explains all of this.

SCCM ConfigMgr CB Download Upgrade Step by Step Guide Configuration Manager Intune - Fig.2
SCCM ConfigMgr CB Download Upgrade Step by Step Guide Configuration Manager Intune – Fig.2

SCCM ConfigMgr CB TP 1705 – Available to Install

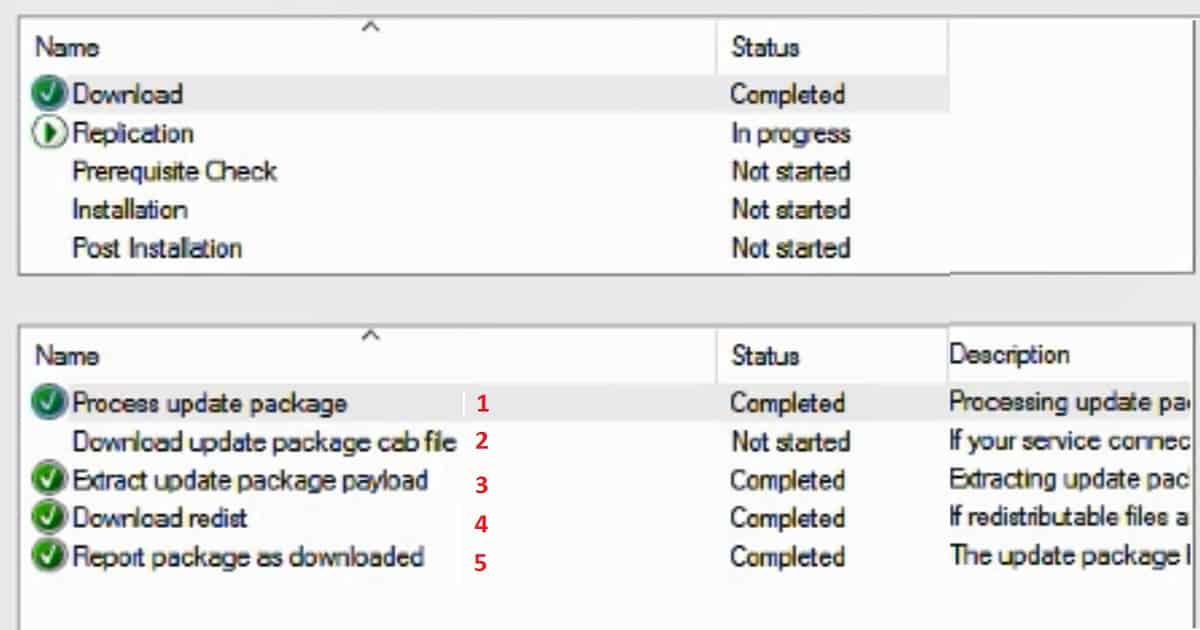
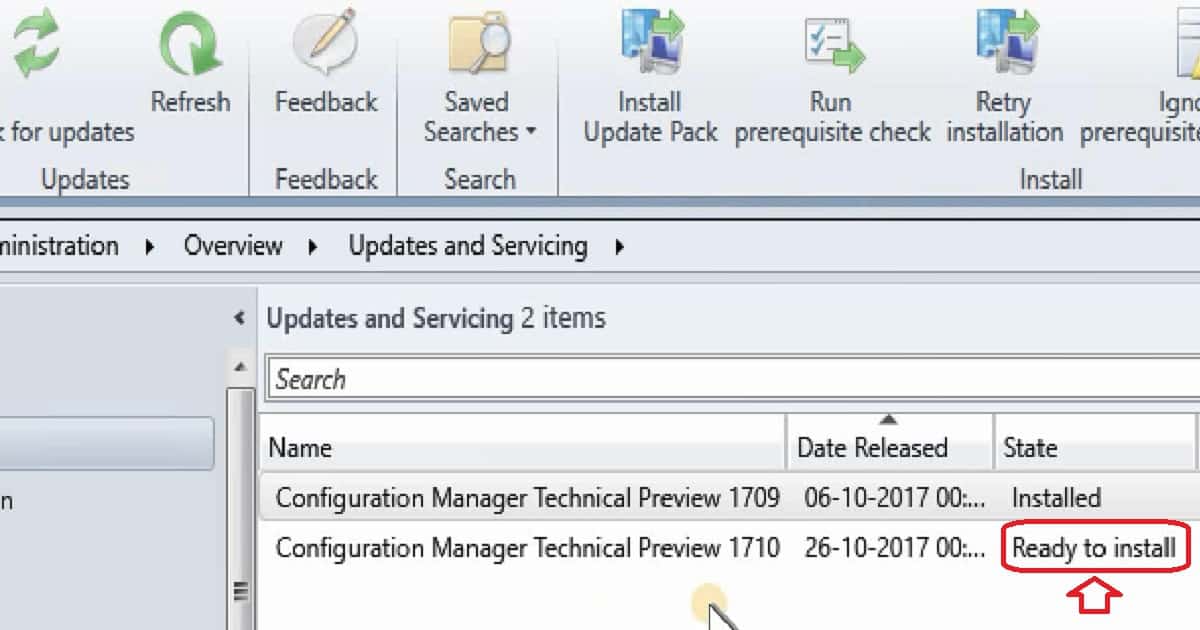
The following are the high-level steps of SCCM ConfigMgr CB in the console download process. The screenshot below shows the SCCM pack install update. It is in the state of Ready to install.

SCCM ConfigMgr CB TP 1705 – Available to Install
Process update package
Download the updated package cab file
Extract update package payload
Download Redist
Report package as downloaded
SCCM ConfigMgr CB Download Upgrade Step by Step Guide Configuration Manager Intune – Table 1
SCCM ConfigMgr CB Download Upgrade Step by Step Guide Configuration Manager Intune - Fig.3
SCCM ConfigMgr CB Download Upgrade Step by Step Guide Configuration Manager Intune – Fig.3

Once the content download of SCCM ConfigMgr has been completed, we can start the installation process of SCCM CB TP 1705. Right-click on the update and tap on “Install update pack.” This action will initiate an upgrade wizard. You can select some important options as part of this upgrade wizard. Monitor this process via CMUpdate.log and the SCCM CB console.

SCCM ConfigMgr CB TP 1705 – Prerequisite Checks

Before the start of the installation, the upgrade process will carry out prerequisite checks, such as checking the disk space available on the server. It will also include loads of other checks to ensure the upgrade process goes through without any issues.

SCCM ConfigMgr CB Download Upgrade Step by Step Guide Configuration Manager Intune - Fig.4
SCCM ConfigMgr CB Download Upgrade Step by Step Guide Configuration Manager Intune – Fig.4

SCCM ConfigMgr CB TP 1705 – Installation Process

Once the necessary pre-checks have been completed, the actual upgrade process will start. CMUpdate.log is your friend in this SCCM ConfigMgr CB TP 1705 upgrade process. Upgrading the ConfigMgr Database is the most important and time-consuming step in this SCCM CB installation process. Installing files is another process that may take a long time to finish, as you see in the video embedded in this video post.

SCCM ConfigMgr CB TP 1705 – Post Installation Steps

The post-installation steps of SCCM CB 1705 are critical; this is where the SCCM Executive service will be installed. SQL-based replication services, SMS hierarchy manager, etc., were installed during this step. SiteComp.log is your best friend in this step to monitor the progress of that installation.SCCM ConfigMgr CB TP 1705 – Console Upgrades.

The SCCM CB TP 1705 console upgrade is the last step of the in-console upgrade process. This is explained in the SCCM video tutorial embedded in this post. The SCCM CB TP 1705 console version is “5.00.8525.100,” and the site Server version is “5.00.8525.100.

SCCM ConfigMgr CB Download Upgrade Step by Step Guide Configuration Manager Intune - Fig.5
SCCM ConfigMgr CB Download Upgrade Step by Step Guide Configuration Manager Intune – Fig.5

Resources

Update 1705 for Configuration Manager Technical Preview Branch – Available Now!
More detailed Technical details on SCCM CB TP 1705

We are on WhatsApp now. To get the latest step-by-step guides, news, and updates, Join our Channel. Click here. HTMD WhatsApp.

Author

Anoop C Nair is Workplace Technology solution architect with 25+ years of experience in global enterprise organizations such as JP Morgan, Capgemini, etc. He is Microsoft Certified Trainer. Microsoft MVP from 2015 onwards for consecutive 11 years! He also conducts Intune and modern workplace tech training for enterprise organizations. He is Blogger, Speaker, and Founder of HTMD Community and HTMD Conference. His focus is on Device Management technologies such as Intune, Windows, Cloud PC, He writes about technologies like Intune, SCCM, Windows, Cloud PC, Windows, Entra, Microsoft Security.
Anoop C Nair is Workplace Technology solution architect with 25+ years of experience in global enterprise organizations such as JP Morgan, Capgemini, etc. He is Microsoft Certified Trainer. Microsoft MVP from 2015 onwards for consecutive 11 years! He also conducts Intune and modern workplace tech training for enterprise organizations. He is Blogger, Speaker, and Founder of HTMD Community and HTMD Conference. His focus is on Device Management technologies such as Intune, Windows, Cloud PC. He writes about technologies like Intune, SCCM, Windows, Cloud PC, Windows, Entra, Microsoft Security.
Create SCEP Certificate Profiles in Intune Deploy SCEP Profiles to Windows 10 Devices 6

Create SCEP Certificate Profiles in Intune Deploy SCEP Profiles to Windows 10 Devices

Let’s discuss how to Create SCEP Certificate Profiles in Intune and Deploy them to Windows 10 Devices. In this post, we will create and deploy an SCEP Certificate to Windows 10 Devices (How to Deploy an SCEP Certificate to Windows Devices).

We must take care of some prerequisites before creating SCEP Certificates in Intune. On-prem infrastructure components must be available before creating SCEP cert profiles in Intune. Related post > Intune SCEP HTTP Errors Troubleshooting Made Easy With Joy – #5 (anoopcnair.com)

NDES setup for SCEP – The NDES connector should be installed on your data center, and the NDES connector should be able to talk to the CA server and use the Azure AD App proxy connector if you are using the Azure app proxy.

I won’t cover the setup of NDEs and the Azure AD App proxy connector. Those two configurations are very complex and well explained in other blogs.

Intune SCEP Certificate Deployment for Windows 10 Devices – SCEP Certificates to Users Devices

Before creating a Windows 10 SCEP Certificate in Intune, you need to create and deploy a certificate chain. The certificate chain includes the Root CA certificate and the Intermediate /Issuing CA certificate. Intune offers three certificate profiles: TRUSTED Certificate, SCEP Certificate, and PKCS Certificate. We are not going to use the PKCS certificate for SCEP profile deployment.

Create SCEP Certificate Profiles in Intune Deploy SCEP Profiles to Windows 10 Devices – Video 1

Create SCEP Certificate Profiles in Intune Deploy SCEP Profiles to Windows 10 Devices

Deploying SCEP Certificates to Windows 10 Devices will help connect corporate resources like Wi-Fi and VPN profiles. Before making a Windows 10 SCEP Certificate in Intune, you must create and deploy a certificate chain. The certificate chain includes the Root CA and Intermediate /Issuing CA certificates.

Intune offers 3 certificate profiles: TRUSTED Certificate, SCEP Certificate, and PKCS Certificate. We will not use the PKCS certificate for SCEP profile deployment.

Create SCEP Certificate Profiles in Intune Deploy SCEP Profiles to Windows 10 Devices - Fig.1
Create SCEP Certificate Profiles in Intune Deploy SCEP Profiles to Windows 10 Devices – Fig.1

Intune Create SCEP Certificate Profiles in Endpoint Manager Deploy SCEP profiles to Windows 10 Devices. Following are the high-level tasks for deploying the SCEP Certificate to Windows10 Devices via Intune:-

Create and Deploy iOS Root CA certificate using Intune Azure Portal
Create and Deploy iOS Intermediate/Issuing CA Certificate using Intune Azure Portal
Create and Deploy SCEP Certificate to iOS Devices using Intune Azure Portal.

Create and Deploy Windows 10 Root CA, Windows 10 Intermediate/Issuing CA Certificate Profiles

As the first step, we need to create a Root CA cert profile. To create a Root CA cert, navigate through Microsoft Intune—Device Configuration—Profiles—Create a profile. Select the platform as Windows 10 and the profile type as Trusted Certificate. You must then browse and upload your ROOT CA cert (the Name of the cert = ACN-Enterprise-Root-CA.CER)from your CA server.

We need to select a destination store in the Windows 10 Trusted certificate profile. For the root certificate profile, we must select Computer Certificate store—root. Once the settings are saved, you must deploy the root certificate profile to the required Windows 10 devices.

PlatformProfile type
Windows 8.1 and laterTrusted Certificate
Create SCEP Certificate Profiles in Intune Deploy SCEP Profiles to Windows 10 Devices – Table 1
Create SCEP Certificate Profiles in Intune Deploy SCEP Profiles to Windows 10 Devices - Fig.2
Create SCEP Certificate Profiles in Intune Deploy SCEP Profiles to Windows 10 Devices – Fig.2

We must follow the same process for deploying the Intermediate/Issuing CA certificate profile via Intune. Make sure that you upload the issuing CA cert (Name of cert = ACN-Issuing-CA-PR1.CER) from your CA server.

Another point we need to take care of is the destination store. We need to select the destination store as Computer Certificate Store—Intermediate. Click OK—Create to finish creating the Issuing cert profile.

Deploy Windows 10 Root CA and Intermediate/Issuing CA Certificate Profiles to the same group of Windows 10 devices. We can deploy these profiles using either an AAD user or device group. However, I would prefer to use AAD dynamic device groups wherever possible.

Create and Deploy Windows 10 SCEP Profile via Intune – Intune Create SCEP Certificate Profiles

To create and deploy a SCEP profile on Windows 10 devices, navigate to Microsoft Intune—Device Configuration—Profiles—”Create a profile.” Select the platform as Windows 10 and the profile type as SCEP Certificate.

When you create a SCEP profile for a Windows 10 device, you need to make some specific settings. The load of these configurations can differ between the CA server setup and another on-prem component setup.

Create SCEP Certificate Profiles in Intune Deploy SCEP Profiles to Windows 10 Devices - Fig.3
Create SCEP Certificate Profiles in Intune Deploy SCEP Profiles to Windows 10 Devices – Fig.3

The certificate validity period is 1 year, which is the industry standard. There are four options for the Key storage provider (KSP): Enrol to trusted platform Module(TPM) KSP if present Software KSP, Enrol to Trusted platform module(TPM), otherwise fail, Enrol to passport, otherwise fail, and Enrol to Software KSP.

In this scenario, I have selected Enrol to Trusted Platform Module(TPM) KSP if the Software KSP is present. We must choose the subject name format value depending on your organizational requirement. In this scenario, I selected a familiar name as an email. The subject alternative name is UPN. Key usage is a digital signature and key encipherment. The key Size value is 2048. If your CA supports the same, the hash algorithm value (SHA-2) should be the latest one.

Another critical point is linking the SCEP profile with the ROOT cert profile you created. If you have not created any ROOT cert and intermediate/issuing CA cert profiles in Intune, it won’t allow you to create an SCEP profile. Extended key usage is another setting, and it should automatically get populated. One example here is “Client Authentication—1.3.6.1.5.5.7.4.3.”

Create SCEP Certificate Profiles in Intune Deploy SCEP Profiles to Windows 10 Devices - Fig.4
Create SCEP Certificate Profiles in Intune Deploy SCEP Profiles to Windows 10 Devices – Fig.4

Enrollment Settings is the last set of settings for Windows 10 SCEP profiles in Intune. I recommend keeping the certificate renewal threshold at the default value of 20%. SCEP server URLs (e.g., https://acnndes-sccz.msappproxy.net/certsrv/mscep/mscep.dll) are very important. These are the URLs to which Windows 10 devices will go and request SCEP certs.

This should be reachable from the Internet. As I mentioned above, you can use Azure AD app proxy URLs. In this scenario, I will use Azure AD app proxy settings.

SCEP profile cert will be deployed to users’ stores in the format “ACN-Issuing-CA-PR5“.

End-User Windows 10 Certificate Store Experience Intune Create SCEP Certificate Profiles

SCEP profile will be deployed to Current User\Personal\Certificates = “ACN-Issuing-CA-PR5

Root and Intermediate CA cert will be deployed to Local Computer\Intermediate Certification Authorities\Certificates = ACN-Enterprise-Root-CA.CER and ACN-Issuing-CA-PR1.CER

Create SCEP Certificate Profiles in Intune Deploy SCEP Profiles to Windows 10 Devices - Fig.5
Create SCEP Certificate Profiles in Intune Deploy SCEP Profiles to Windows 10 Devices – Fig.5

Resources

We are on WhatsApp now. To get the latest step-by-step guides, news, and updates, Join our Channel. Click here. HTMD WhatsApp.

Author

Anoop C Nair is Workplace Technology solution architect with 25+ years of experience in global enterprise organizations such as JP Morgan, Capgemini, etc. He is Microsoft Certified Trainer. Microsoft MVP from 2015 onwards for consecutive 11 years! He also conducts Intune and modern workplace tech training for enterprise organizations. He is Blogger, Speaker, and Founder of HTMD Community and HTMD Conference. His focus is on Device Management technologies such as Intune, Windows, Cloud PC, He writes about technologies like Intune, SCCM, Windows, Cloud PC, Windows, Entra, Microsoft Security.
Anoop C Nair is Workplace Technology solution architect with 25+ years of experience in global enterprise organizations such as JP Morgan, Capgemini, etc. He is Microsoft Certified Trainer. Microsoft MVP from 2015 onwards for consecutive 11 years! He also conducts Intune and modern workplace tech training for enterprise organizations. He is Blogger, Speaker, and Founder of HTMD Community and HTMD Conference. His focus is on Device Management technologies such as Intune, Windows, Cloud PC. He writes about technologies like Intune, SCCM, Windows, Cloud PC, Windows, Entra, Microsoft Security.
Create SCEP Certificate Profiles Deploy SCEP Profiles to iOS Devices using Intune 7

Create SCEP Certificate Profiles Deploy SCEP Profiles to iOS Devices using Intune

Let’s discuss creating SCEP Certificate Profiles and Deploying them to iOS Devices using Intune. Before obtaining an SCEP certificate in Intune, we must consider some prerequisites.

It would be best if you also had on-prem infrastructure components available. NDES connector is supposed to be installed on your Data Center, and the NDES connector should be able to talk to the CA server and Azure AD App proxy connector if you are using the Azure app proxy.

In “Intune SCEP HTTP Errors Troubleshooting Made Easy With Joy – #5,” Joymalya Basu Roy provides a comprehensive guide on diagnosing and resolving HTTP errors encountered during SCEP (Simple Certificate Enrollment Protocol) certificate deployments using Microsoft Intune. The post focuses on various HTTP errors, particularly the HTTP 500 Internal Server Error, and offers detailed steps to effectively identify and troubleshoot these issues.

I won’t cover the setup of NDEs and Azure AD App proxy connectors. Those two configurations are complex and well explained in loads of other blogs. This post will cover how to create and deploy a SCEP Profile for iOS Devices via Intune Blade in the Azure portal.

How to Create and Deploy SCEP Certificate with Intune for iOS Devices

Deployment of SCEP Certificates to iOS devices will help them connect to corporate Wi-Fi and VPN profiles, etc.… You must create and deploy the certificate chain before creating an iOS SCEP Certificate in Intune.

The certificate chain includes the Root CA and Intermediate/Issuing CA certificates. There are 3 certificate profiles available in Intune: the TRUSTED Certificate, the SCEP Certificate, and the PKCS certificate. We are not going to use the PKCS certificate for SCEP profile deployment.

Create SCEP Certificate Profiles Deploy SCEP Profiles to iOS Devices using Intune – Video 1

Introduction – Create SCEP Certificate Profiles Deploy SCEP Profiles to iOS Devices using Intune

Deploying a SCEP Certificate to iOS devices will help them connect to corporate Wi-Fi, VPN profiles, etc. Before creating an iOS SCEP Certificate in Intune, you need to develop and deploy a certificate chain. The certificate chain includes the Root CA and Intermediate/Issuing CA certificates.

There are 3 certificate profiles available in Intune: TRUSTED Certificate, SCEP Certificate, and PKCS certificate. We are not going to use the PKCS certificate for SCEP profile deployment. The following is the high-level task list for deploying SCEP Profile to iOS Devices (Deploy SCEP profiles to iOS Devices).

Create SCEP Certificate Profiles Deploy SCEP Profiles to iOS Devices using Intune
Create and Deploy iOS Root CA certificate using Intune Azure Portal
Or Create and Deploy an iOS Intermediate CA certificate using Intune Azure Portal
Create and Deploy SCEP Certificate to iOS Devices using Intune Azure Portal
Create SCEP Certificate Profiles Deploy SCEP Profiles to iOS Devices using Intune – Table 1
Create SCEP Certificate Profiles Deploy SCEP Profiles to iOS Devices using Intune - Fig.1
Create SCEP Certificate Profiles Deploy SCEP Profiles to iOS Devices using Intune – Fig.1

Create and Deploy iOS Root CA, iOS Intermediate/Issuing CA Certificate Profiles

As the first step, we need to create a Root CA cert profile. To create a Root CA cert, navigate through Microsoft IntuneDevice ConfigurationProfilesCreate a profile (Deploy SCEP profiles to iOS Devices). Select the platform iOS and profile type Trusted Certificate. You must browse and upload your ROOT CA cert (Name of the cert = ACN-Enterprise-Root-CA.CER) from your CA server.

Once settings are saved, you must deploy the root cert profile to the required iOS devices. The exact process must follow for Intermediate/Issuing CA certificate profile deployment via Intune. Intune Create SCEP Certificate Profiles Deploy SCEP profiles to iOS Devices using Intune.

Make sure that you are uploading the issuing CA cert (Name of cert = ACN-Issuing-CA-PR1.CER) from your CA server. The video above explains all these configurations; you can watch them here.

Create and Deploy iOS SCEP Certificate Profile for iOS Devices

To create a SCEP certificate profile, navigate to Microsoft Intune – Device Configuration – Profiles – Create a profile. While making an iOS SCEP Certificate, we must select the Profile type as “SCEP certificate” and the platform as iOS.

The next step is configuring the settings. These settings are critical, and we need to consult with your CA team when you create a SCEP Certificate. Loads of these configurations can differ between the CA server setup and another on-prem component setup (Deploy SCEP profiles to iOS Devices).

The certificate validity period is 1 year, which is the industry standard. The subject name format also depends on your organization’s preference. In this scenario, I selected a familiar name as email and a subject alternative name as UPN. The key usage is a digital signature and critical decipherment. The key Size is 2048.

Another critical point is linking the SCEP Certificate with the ROOT cert profile you created. If you have not earned any ROOT certification in Intune, you won’t be able to develop an SCEP Certificate. Extended key usage is another setting, and it should automatically get populated.

One example here is Client Authentication – 1.3.6.1.5.5.7.4.3. Intune Create SCEP Certificate Profiles Deploy SCEP profiles to iOS Devices using Intune.

Create SCEP Certificate Profiles Deploy SCEP Profiles to iOS Devices using Intune - Fig.2
Create SCEP Certificate Profiles Deploy SCEP Profiles to iOS Devices using Intune – Fig.2

Enrollment Settings is the last set of settings for iOS SCEP profiles in Intune. I recommend keeping the renewal threshold of certificates as the default value of 20%. SCEP server URLs are critical. These are the URLs to which iOS devices will request SCEP certifications.

So, this should be reachable from the Internet. As mentioned above, you can use Azure AD App proxy URLs here (e.g., https://acnndes-sccz.msappproxy.net/certsrv/mscep/mscep.dll ). In this scenario, I will use Azure AD App proxy settings. All these configuration details are explained in the video here.

SCEP certificate will be in the following format: “ACN-Issuing-CA-PR5“.

Resources

We are on WhatsApp now. To get the latest step-by-step guides, news, and updates, Join our Channel. Click here. HTMD WhatsApp.

Author

Anoop C Nair is Microsoft MVP! He is a Device Management Admin with more than 20 years of experience (calculation done in 2021) in IT. He is a Blogger, Speaker, and Local User Group HTMD Community leader. His primary focus is Device Management technologies like SCCM 2012, Current Branch, and Intune. He writes about ConfigMgr, Windows 11, Windows 10, Azure AD, Microsoft Intune, Windows 365, AVD, etc.

Anoop C Nair is Workplace Technology solution architect with 25+ years of experience in global enterprise organizations such as JP Morgan, Capgemini, etc. He is Microsoft Certified Trainer. Microsoft MVP from 2015 onwards for consecutive 11 years! He also conducts Intune and modern workplace tech training for enterprise organizations. He is Blogger, Speaker, and Founder of HTMD Community and HTMD Conference. His focus is on Device Management technologies such as Intune, Windows, Cloud PC. He writes about technologies like Intune, SCCM, Windows, Cloud PC, Windows, Entra, Microsoft Security.
Configure Password Policies for Android Enterprise Work Profile using Intune 8

Configure Password Policies for Android Enterprise Work Profile using Intune

Key Takeaways

  • Secure Android Enterprise devices with Device Restrictions policies.
  • Protect corporate data by controlling device features and settings.
  • Restrict data sharing between work and personal profiles.
  • Manage work profile behavior to improve security.

Let’s learn Configure Password Policies for Android Enterprise Work Profile using Intune. Android for Work Device Restriction Policies Deployment is the Security Policy for Android Devices. Security policies are important to secure the corporate data and applications on those devices. Microsoft Intune provides Device Restrictions policies to help organizations secure Android Enterprise devices by controlling device features and restricting user actions.

Table of Contents

Configure Password Policies for Android Enterprise Work Profile using Intune

In this guide, you’ll learn how to create and deploy an Android Enterprise Device Restrictions policy using the Microsoft Intune admin center. We’ll walk through the policy creation process, configure the available restriction settings, and assign the policy to Microsoft Entra ID groups.

By implementing Device Restrictions policies, administrators can control work profile behavior, limit data sharing, manage hardware features, and enhance the overall security of Android Enterprise devices. Following these best practices helps organizations maintain a secure and compliant mobile environment.

Get Start the Profile Creation

To begin, sign in to the Microsoft Intune admin center with an account that has the required administrative permissions. From the left navigation pane, select Devices, and then click Configuration to access the list of device configuration policies.

  • On the Configuration page, click + Create, and then select + New policy.
Configure Password Policies for Android Enterprise Work Profile using Intune - Fig.1
Configure Password Policies for Android Enterprise Work Profile using Intune – Fig.1

When you select + New policy, the Create a profile window opens. Here, choose Android Enterprise as the Platform, Templates as the Profile type, and then select Device restrictions from the list of available templates. Templates provide a preconfigured collection of settings organized by functionality, making it easier to create policies without manually selecting individual settings.

They help administrators quickly configure common device management and security settings for managed devices. After selecting Device restrictions, click Create to begin configuring the policy.

PlatformProfile Type
Android Enterprise Device Restrictions
Configure Password Policies for Android Enterprise Work Profile using Intune – Table 1
Configure Password Policies for Android Enterprise Work Profile using Intune - Fig.2
Configure Password Policies for Android Enterprise Work Profile using Intune – Fig.2

Basic Tab

On the Basics page, provide a meaningful Name and an optional Description for the Device Restrictions policy. Using a descriptive policy name makes it easier to identify and manage the policy in the Microsoft Intune admin center, especially when multiple configuration profiles are deployed.

For this example, enter Android Enterprise Device Restrictions as the policy name and Configures device restriction settings for Android Enterprise devices as the description. Verify that the Platform is set to Android Enterprise and the Profile type is Device restrictions, then click Next to continue.

Configure Password Policies for Android Enterprise Work Profile using Intune - Fig.3
Configure Password Policies for Android Enterprise Work Profile using Intune – Fig.3

Configuration Settings

On the Configuration settings page, you’ll find several categories of device restriction settings, including General, System security, Device experience, Device password, Power Settings, Users and Accounts, Applications, Connectivity, Work profile password, and Personal profile. These categories allow you to configure security and device management settings based on your organization’s requirements.

CategoryPurpose
GeneralControls core device behaviors such as screen capture, camera access, date or time changes, and roaming data
System securityDefines encryption, certificate, and security patch requirements. Strengthens device integrity and compliance.
Device experienceManages user interface and experience settings like status bar visibility, notifications, and accessibility features. Ideal for kiosk or frontline devices.
Power SettingsControls power menu access, sleep behavior, and battery optimization. Prevents unauthorized shutdowns or tampering.
Users and AccountsRestricts account additions, sync settings, and user management.
ApplicationsManages app installation permissions, updates, and restrictions. Supports app whitelisting or blacklisting for compliance.
ConnectivityControls Bluetooth, Wi‑Fi, USB, and hotspot access. Prevents data leakage and enforces secure network usage.
Work profile passwordEnforces password rules specifically for corporate‑owned work profiles, expiry, and wipe thresholds. Protects enterprise data within work containers.
Personal profileControl camera, screen capture, and app installation from unknown sources. Balances privacy and control.
Custom support informationDisplays IT helpdesk contact or support portal details on the device. Improves user self‑service and compliance.
Configure Password Policies for Android Enterprise Work Profile using Intune – Table.2
Configure Password Policies for Android Enterprise Work Profile using Intune - Fig.4
Configure Password Policies for Android Enterprise Work Profile using Intune – Fig.4

Configure Work Profile Device Restriction Settings

Expand the required category to configure its available settings. In this example, the Work profile password section is used to define password requirements for corporate-owned work profile devices, including the required password type, minimum password length, password expiration period, password history, sign-in failure threshold, and unlock frequency.

  • Expand each category and configure the appropriate settings for your Android Enterprise devices.
  • Review the configured options carefully before proceeding. After completing the required configurations, click Next to continue to the next step.
SettingInfo
Required password typeNumeric complex
Minimum password length6
Number of days until password expires90
Number of passwords required before reuse22
Number of sign‑in failures before wiping device10
Required unlock frequencyDevice default
Configure Password Policies for Android Enterprise Work Profile using Intune – Table 3
Configure Password Policies for Android Enterprise Work Profile using Intune - Fig.5
Configure Password Policies for Android Enterprise Work Profile using Intune – Fig.5

Scope Tags Settings

Scope tags help limit which administrators can view and manage this Device Restrictions policy based on their assigned roles. Click Select scope tags to choose one or more scope tags, or leave the default configuration if your organization doesn’t use RBAC. After completing this step, click Next to continue.

Configure Password Policies for Android Enterprise Work Profile using Intune - Fig.6
Configure Password Policies for Android Enterprise Work Profile using Intune – Fig.6

Importance of Assignments

The Assignments page determines which users or devices receive the Android Enterprise Device Restrictions policy. Under Included groups, click Add groups and select the Microsoft Entra ID user or device groups that should receive the policy. If necessary, you can also configure Excluded groups to prevent the policy from applying to specific users or devices.

  • After selecting the appropriate groups, review the assignment configuration and click Next.
Configure Password Policies for Android Enterprise Work Profile using Intune - Fig.7
Configure Password Policies for Android Enterprise Work Profile using Intune – Fig.7

Review + Create Options

The Review + create page displays a summary of the policy configuration, including the platform, profile template, configured device restriction settings, scope tags, and assignments. Carefully review all settings to ensure they match your organization’s security requirements before creating the policy.

If you need to make any changes, click Previous to return to the relevant step. When you’re satisfied with the configuration, click Create to deploy the Android Enterprise Device Restrictions policy.

Configure Password Policies for Android Enterprise Work Profile using Intune - Fig.8
Configure Password Policies for Android Enterprise Work Profile using Intune – Fig.8

Monitor Device Restrictions Policy Deployment Status

After creating the Android Enterprise Device Restrictions policy, you can monitor its deployment status from the Microsoft Intune admin center. Navigate to Devices > Configuration, and then select the Android Enterprise Device Restrictions policy you created.

Open the Device and user check-in status or Overview page to review the deployment results. Here, you can verify whether the policy was successfully applied to the targeted devices and identify any devices with Pending, Error, Conflict, or Not applicable statuses. This information helps troubleshoot deployment issues and confirm that the policy is being enforced correctly.

Configure Password Policies for Android Enterprise Work Profile using Intune - Fig.9
Configure Password Policies for Android Enterprise Work Profile using Intune – Fig.9

Delete the Device Restrictions Policy

If the Device Restrictions policy is no longer required, you can permanently delete it from Microsoft Intune. Go to Devices > Configuration, locate the Android Enterprise Device Restrictions policy, and select it.

Click the 3-dot (More) menu or Delete option from the command bar, and then confirm the deletion when prompted. Once deleted, the policy is permanently removed from Intune and will no longer be applied to managed Android Enterprise devices.

For detailed information, you can refer to our previous post – Learn How to Delete or Remove App Assignment from Intune using by Step-by-Step Guide.

Configure Password Policies for Android Enterprise Work Profile using Intune - Fig.10
Configure Password Policies for Android Enterprise Work Profile using Intune – Fig.10

Remove Assigned Groups from the Device Restrictions Policy

If you no longer want the Device Restrictions policy to apply to specific users or devices, you can remove the assigned groups from the policy. Open the policy, select Properties, and click Edit next to Assignments.

Under Included groups, remove the Microsoft Entra ID groups that are currently assigned to the policy. Review the updated assignments and click Review + save, After the policy is updated, it will no longer be deployed to the removed groups.

For detailed information, you can refer to our previous post – How to Delete Allow Clipboard History Policy in Intune Step by Step Guide.

Configure Password Policies for Android Enterprise Work Profile using Intune - Fig.11
Configure Password Policies for Android Enterprise Work Profile using Intune – Fig.11

User Experience of Security Policy for Android Devices

The user experience of Android for Work devices can vary depending on the manufacturer of the devices. As mentioned in the previous post, Samsung and Nexus are the best-experienced devices I have tested.

But I would admit the user experience of Android for Work is far better than that of an Android device! As Android devices have different variants, it’s better to ensure that all the security policies for the Android device experience are excellent for all manufacturers.

Configure Password Policies for Android Enterprise Work Profile using Intune – Video 1

Need Further Assistance or Have Technical Questions?

Join the LinkedIn Page and Telegram group to get the latest step-by-step guides and news updates. Join our Meetup Page to participate in User group meetings. Also, Join the WhatsApp Community and WhatsApp Channel to get the latest news on Microsoft Technologies. We are there on Reddit as well.

Author

Anoop C Nair has been Microsoft MVP from 2015 onwards for 10 consecutive years! He is a Workplace Solution Architect with more than 22+ years of experience in Workplace technologies. He is also a Blogger, Speaker, and Local User Group Community leader. His primary focus is on Device Management technologies like SCCM and Intune. He writes about technologies like Intune, SCCM,  Windows,  Cloud PC, Windows, Entra, Microsoft Security, Career, etc.

Anoop C Nair is Workplace Technology solution architect with 25+ years of experience in global enterprise organizations such as JP Morgan, Capgemini, etc. He is Microsoft Certified Trainer. Microsoft MVP from 2015 onwards for consecutive 11 years! He also conducts Intune and modern workplace tech training for enterprise organizations. He is Blogger, Speaker, and Founder of HTMD Community and HTMD Conference. His focus is on Device Management technologies such as Intune, Windows, Cloud PC. He writes about technologies like Intune, SCCM, Windows, Cloud PC, Windows, Entra, Microsoft Security.
Intune Create Device Restriction Policy Profiles Deploy Security Policies to Windows 10 Devices 9

Intune Create Device Restriction Policy Profiles Deploy Security Policies to Windows 10 Devices

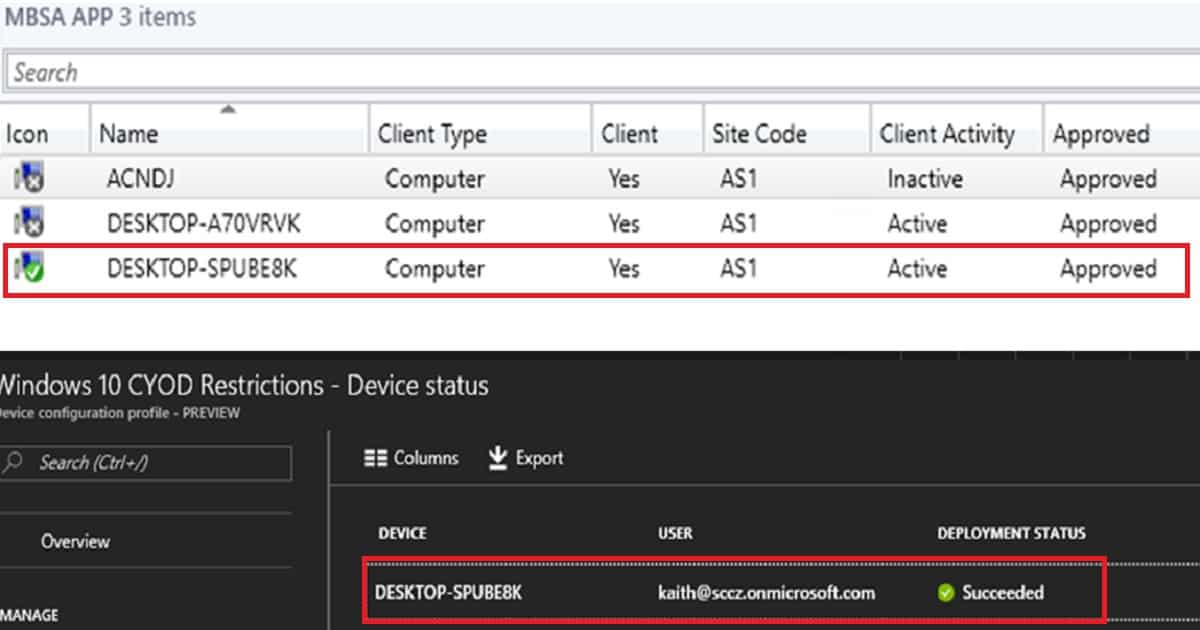
Let’s discuss the Intune Create Device Restriction Policy Profiles Deploy Security Policies to Windows 10 Devices. Intune configuration restriction policies are critical in modern device management strategy. Intune device restriction policy is the security settings applied on your Windows 10 CYOD device.

As part of your organization’s security policies, you may need to lock down mobile or Windows devices with corporate data and app access. Yes, Intune configuration restriction policies help you lock down Windows devices as per your organization’s security requirements.

In this post, you will learn everything you need to create device restriction policy profiles in Intune and deploy security policies to Windows 10 devices. We will guide you step-by-step through setting up these policies to ensure your devices are secure and comply with your organization’s requirements.

Whether you’re new to Intune or looking to enhance your device management skills, this guide will provide clear and straightforward instructions to help you effectively manage and protect your Windows 10 devices.

Intune Configuration Restriction Policy Deployment with Windows 10

In this video, you’ll learn all about deploying Intune Configuration Restriction Policies on Windows 10. We’ll show you each process step, making it easy to follow. Whether setting up new policies or adjusting existing ones, this video will help you understand how to use Intune to keep your Windows 10 devices secure and well-managed.

Intune Create Device Restriction Policy Profiles Deploy Security Policies to Windows 10 Devices – Video 1

Create Intune Device Restriction Policy for Windows 10 Devices

You can create an Intune device restriction policy for Windows 10 from Microsoft Intune—Device Configuration—Profiles—Create New Profile. I selected Windows 10 as the platform, and platform Selection is essential.

Also, it would be best to select the profile type while creating an Intune Configuration Restriction policy. In my scenario, the Device restriction policy is named “Windows 10 CYOD Restrictions.”

PlatformProfile Type
Windows 10 and LaterDevice Restrictions
Intune Create Device Restriction Policy Profiles Deploy Security Policies to Windows 10 Devices – Table 1
Intune Create Device Restriction Policy Profiles Deploy Security Policies to Windows 10 Devices - Fig.1
Intune Create Device Restriction Policy Profiles Deploy Security Policies to Windows 10 Devices – Fig.1

As shown below, the Windows platform Intune device restriction policy for out-of-box settings is segregated into 16 sections. This list is comprehensive, and we can lock down Windows 10 machines as required.

Is this Intune device restriction policy a replacement for group policies? No, it’s still not a replacement for AD group policies.

  1. General
  2. Password
  3. Personalization
  4. Locked screen experience
  5. App Store
  6. Edge Browser
  7. Search
  8. Cloud and Storage
  9. Cellular and Connectivity
  10. Control Panel and Settings
  11. Defender
  12. Defender Exclusions
  13. Network Proxy
  14. Windows Spotlight
  15. Display
  16. Start

Deploy Windows 10 Intune Device Restriction Policy

You can deploy the Windows 10 Intune Device Restriction Policy to either Windows 10 CYOD dynamic devices or Windows 10 user groups. Dynamic device groups are still in preview, and the group typos are not always stable. So, at least for the next two months, I will prefer to deploy policies to user groups rather than dynamic device groups.

Windows 10 End-user Experience of Intune Device Restriction Policy

As you can see in the video tutorial at the top of this post, I’ve enabled the time settings to disable the option as part of the initial Windows 10 device restriction policy. The end-user logged in to the Windows 10 machine can’t change the time on the system.

After that, I changed the Windows time setting policy again, and after applying the new policy, the user can change the time on the Windows 10 system.

Intune Create Device Restriction Policy Profiles Deploy Security Policies to Windows 10 Devices - Fig.2
Intune Create Device Restriction Policy Profiles Deploy Security Policies to Windows 10 Devices – Fig.2

We are on WhatsApp now. To get the latest step-by-step guides, news, and updates, Join our Channel. Click here. HTMD WhatsApp.

Author

Anoop C Nair is Workplace Technology solution architect with 25+ years of experience in global enterprise organizations such as JP Morgan, Capgemini, etc. He is Microsoft Certified Trainer. Microsoft MVP from 2015 onwards for consecutive 11 years! He also conducts Intune and modern workplace tech training for enterprise organizations. He is Blogger, Speaker, and Founder of HTMD Community and HTMD Conference. His focus is on Device Management technologies such as Intune, Windows, Cloud PC, He writes about technologies like Intune, SCCM, Windows, Cloud PC, Windows, Entra, Microsoft Security.

Anoop C Nair is Workplace Technology solution architect with 25+ years of experience in global enterprise organizations such as JP Morgan, Capgemini, etc. He is Microsoft Certified Trainer. Microsoft MVP from 2015 onwards for consecutive 11 years! He also conducts Intune and modern workplace tech training for enterprise organizations. He is Blogger, Speaker, and Founder of HTMD Community and HTMD Conference. His focus is on Device Management technologies such as Intune, Windows, Cloud PC. He writes about technologies like Intune, SCCM, Windows, Cloud PC, Windows, Entra, Microsoft Security.
How to Enable Intune Company Portal Browser Access for Conditional Access Enabled Web Apps 10

How to Enable Intune Company Portal Browser Access for Conditional Access Enabled Web Apps

Let’s discuss how to Enable Intune Company Portal Browser Access for Conditional Access Enabled Web apps. I have been testing and developing a solution for Android device management with Intune. I have shared my Android for Work learning experiences in my previous posts – Android.

In this post, we will see and learn how to enable Intune Company Portal Browser Access for Android devices. What is the need for enabling company portal browser access?.

To put it in simple words, if your organization is using Azure AD Conditional Access (CA) enabled internal web applications, then we need to enable the Company portal browser access option.

This post will provide a comprehensive guide on enabling Intune Company Portal browser access for conditional access-enabled web apps. We will walk you through the necessary steps to configure your settings, ensuring easy access control and security compliance.

How to Enable Intune Company Portal Browser Access

The above video recording gives you the same user experience when you have CA access-enabled web applications and you have not enabled company portal browser access. As you can see in the video, the managed browser for Android devices gives an error stating that the device is not enrolled.

Yes, the managed browser application can’t understand whether the device is already enrolled. When you perform an action like “Intune Company Portal Browser Access, ” the app will try to install the Microsoft work account certificate on an Android device. There is a known issue with the previous version of the Company Portal application on Android devices.

How to Enable Intune Company Portal Browser Access
Open the Company Portal app.
Go to the Settings page from the ellipsis (…) or hardware menu button.
Press the Enable Browser Access button.
How to Enable Intune Company Portal Browser Access for Conditional Access Enabled Web Apps – Table 1

Microsoft Work Account Certificate Installation Error

Allow the Company portal and Intune-managed apps to record future actions in greater detail, which may help your IT administrator better identify and solve issues.

How to Enable Intune Company Portal Browser Access for Conditional Access Enabled Web Apps - Fig.1
How to Enable Intune Company Portal Browser Access for Conditional Access Enabled Web Apps – Fig.1

End-User Experience of ENROLL Device Error

The solution to the Microsoft mentioned above “work account certificate installation” error is to update the company portal application for Android devices. Are you getting an ENROL error on your device (as you can see in the following screen capture)?

Does this error appear when you try to access Conditional Access-enabled web applications through the managed browser? The web apps without CA are working fine? If so, you must perform the following action from your Android device: “Intune Company Portal Browser Access.”

How to Enable Intune Company Portal Browser Access for Conditional Access Enabled Web Apps - Fig.2
How to Enable Intune Company Portal Browser Access for Conditional Access Enabled Web Apps – Fig.2

Microsoft Work Account Certificate Installation

Now, it’s time to update the company portal application on Android for work-enabled devices. Once the device is updated with the latest version of the company portal app, then open up the company portal app and go to settings – tap on the button “Enable Browser Settings.”

This action opens a popup for installing a Microsoft Work Account certificate. The user must select the cert and tap on the ALLOW button. The video tutorial at the top of this post explains this process.

How to Enable Intune Company Portal Browser Access for Conditional Access Enabled Web Apps - Fig.3
How to Enable Intune Company Portal Browser Access for Conditional Access Enabled Web Apps – Fig.3

End USER Experience of CA-enabled Web Application Access

Once the managed browser has a certificate, the web applications opened in the Managed browser can use the Microsoft Work account cert. This will allow the managed browser to securely open conditional access-enabled internal web applications. In my experience, the user doesn’t require a tap on the INSTALL button; rather, the user must tap on the ALLOW button to complete this configuration.

How to Enable Intune Company Portal Browser Access for Conditional Access Enabled Web Apps - Fig.4
How to Enable Intune Company Portal Browser Access for Conditional Access Enabled Web Apps – Fig.4

We are on WhatsApp now. To get the latest step-by-step guides, news, and updates, Join our Channel. Click here. HTMD WhatsApp.

Author

Anoop C Nair is Microsoft MVP! He is a Device Management Admin with over 20 years of IT experience (calculation done in 2021). He is a Blogger, Speaker, and leader of the Local User Group HTMD Community. His main focus is on Device Management technologies like SCCM 2012, Current Branch, and Intune. He writes about ConfigMgr, Windows 11, Windows 10, Azure AD, Microsoft Intune, Windows 365, AVD, etc.
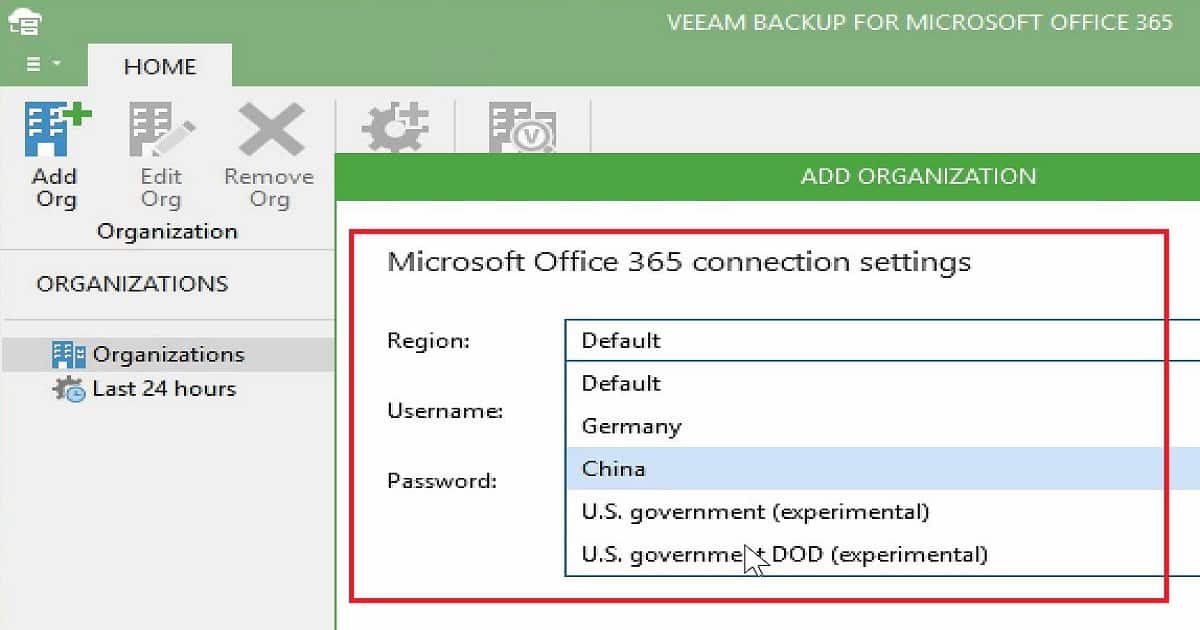
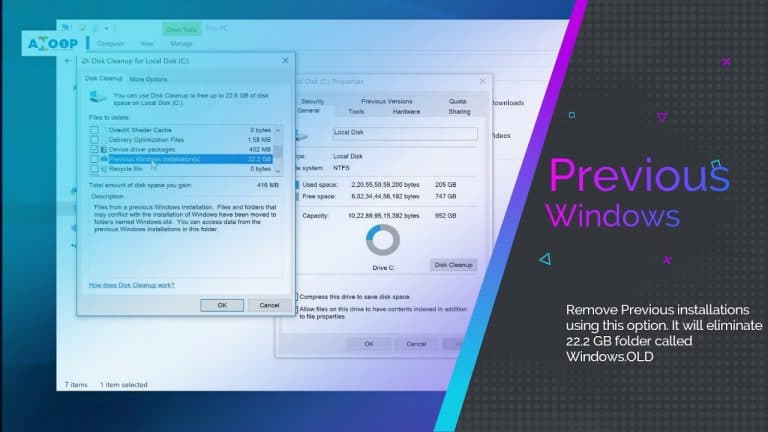
Anoop C Nair is Workplace Technology solution architect with 25+ years of experience in global enterprise organizations such as JP Morgan, Capgemini, etc. He is Microsoft Certified Trainer. Microsoft MVP from 2015 onwards for consecutive 11 years! He also conducts Intune and modern workplace tech training for enterprise organizations. He is Blogger, Speaker, and Founder of HTMD Community and HTMD Conference. His focus is on Device Management technologies such as Intune, Windows, Cloud PC. He writes about technologies like Intune, SCCM, Windows, Cloud PC, Windows, Entra, Microsoft Security.